


E-Bike DIY Journey: Personalizing My HappyRun G50
Personalizing your electric bike can enhance both its functionality and aesthetic appeal. In my journey with the HappyRun G50, I explored various upgrades that not only improved performance but also made my bike uniquely mine. Understanding how to effectively customize your e-bike can lead to a more enjoyable riding experience.
Why Choose an E-Bike?
Hello E-Bikers, Let me tell you my story on how my love for E-Bikes & my passion for wanting to style & customize everything to my liking led to me transforming The HappyRun Tank G50 into my perfect daily commuter & how it is overtaking the need for me to drive my car.
Well, over 6 months ago, I grew tired of the traffic and the construction that was going on in Las Vegas, Nevada. My normal daily commute time almost doubled because of it. The construction was causing me to get a lot of nails in my car tires, which felt like an additional expense due to all the necessary repairs. I had to leave an hour early for work just to make it on time when I was only ten miles (15 min) away from my job. I decided a change was needed and I wanted to become an E-Biker.
I already had an E-Bike but it was small with 16 inch tires and maybe 10 miles range with throttle only. I knew that wasn’t going to work if I was planning on using a E-Bike to commute to work, make a trip to the grocery store, post office & other things around that part of town where I lived.
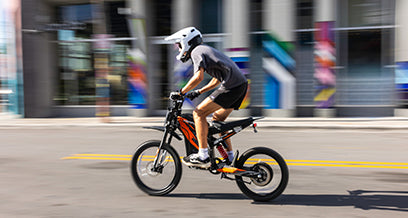
I started doing my research, I was watching YouTube videos, searching for the E-Bike that met my needs. After almost two weeks of looking I came across in what I believe is the best E-Bike out right now & that’s the HappyRun Tank G50 from HappyRun Sports. It checked all my needs because I wanted an E-Bike that could go 30mph, had good range & that had a stylish modern look.
So I ordered the HappyRun Tank G50 and it about a week to get it. It took only 30-45 minutes to put together. It was plenty of videos online to assist with the assembly.
I charged the battery, and the next day, I was ready to give the HappyRun Tank G50 a test drive. I was very impressed with the look, style & and performance of the E-Bike but I was left feeling like I needed more if wanted it to be my daily commuter.
How Did I Start My E-Bike Customization Journey?
I started thinking about what all I needed and how do I go about getting it done. My customization journey began with a desire to make my HappyRun G50 stand out while improving its performance. After researching various options, I decided to focus on practical upgrades that would enhance comfort and usability. This included adding accessories such as a rearview camera, custom license plate, and upgraded handlebars.E-bike customization journey diagram After brainstorming and looking online. I had my mind made up of everything I needed for this to happen. I needed to make this great E-Bike perfect for my daily commute.
What Upgrades Did I Make to My HappyRun G50?
- Rearview Camera Installation: This added safety feature allows me to monitor traffic behind me.
- Custom License Plate: A personalized touch that enhances the bike’s appearance and makes it feel more unique.
- Handlebar Extension: This modification improved my riding posture and control.
Enhancing Safety and Comfort
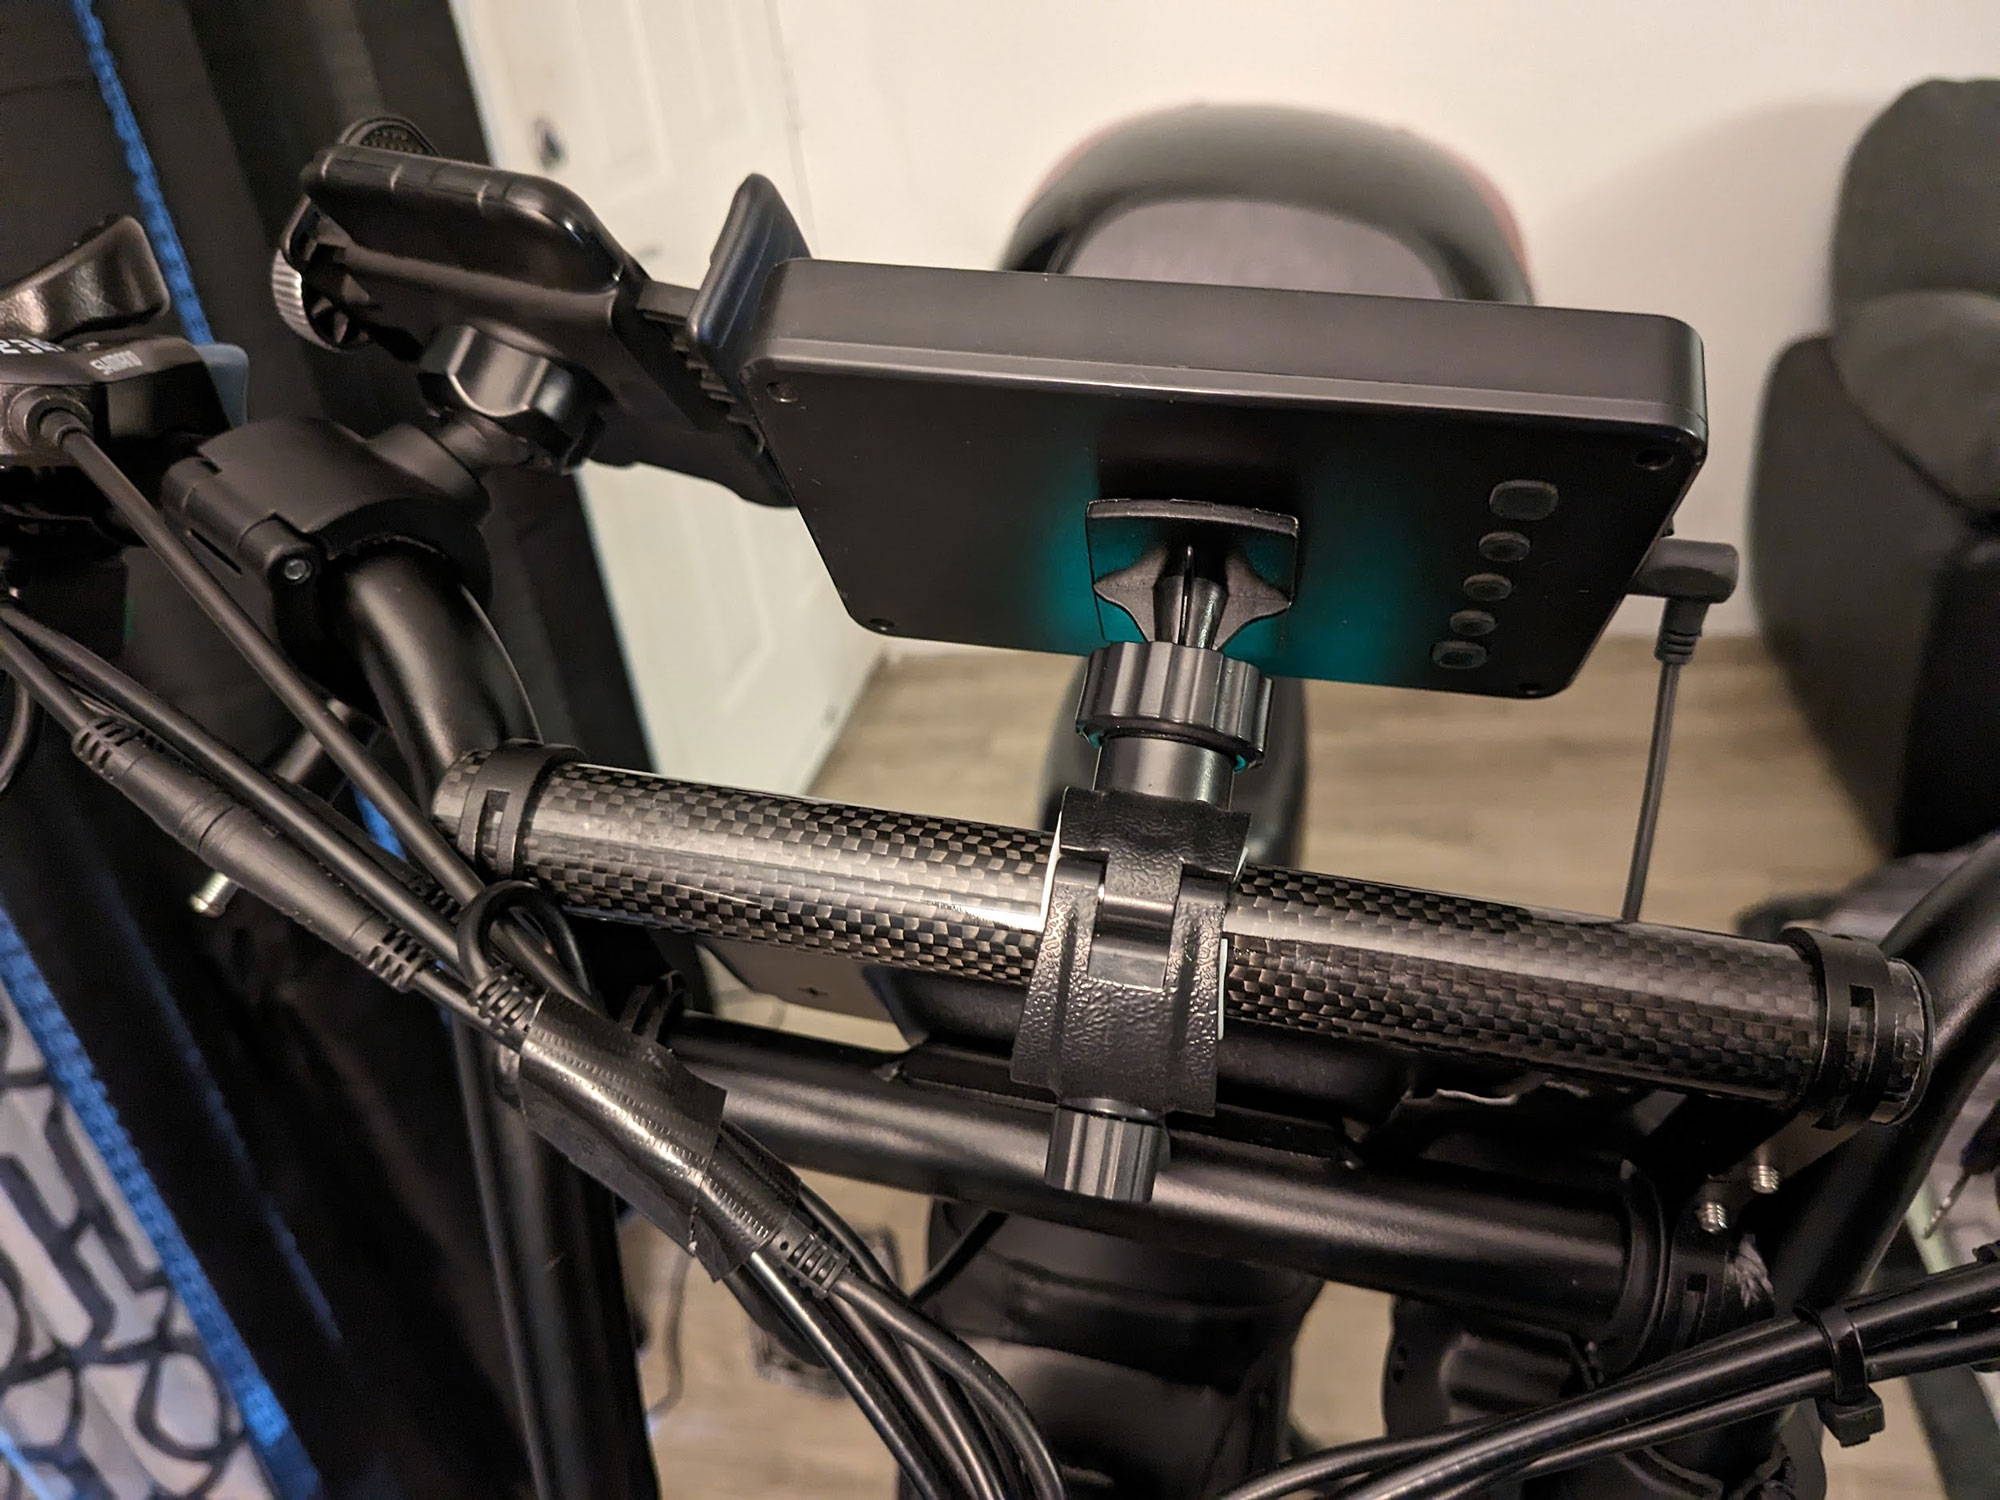
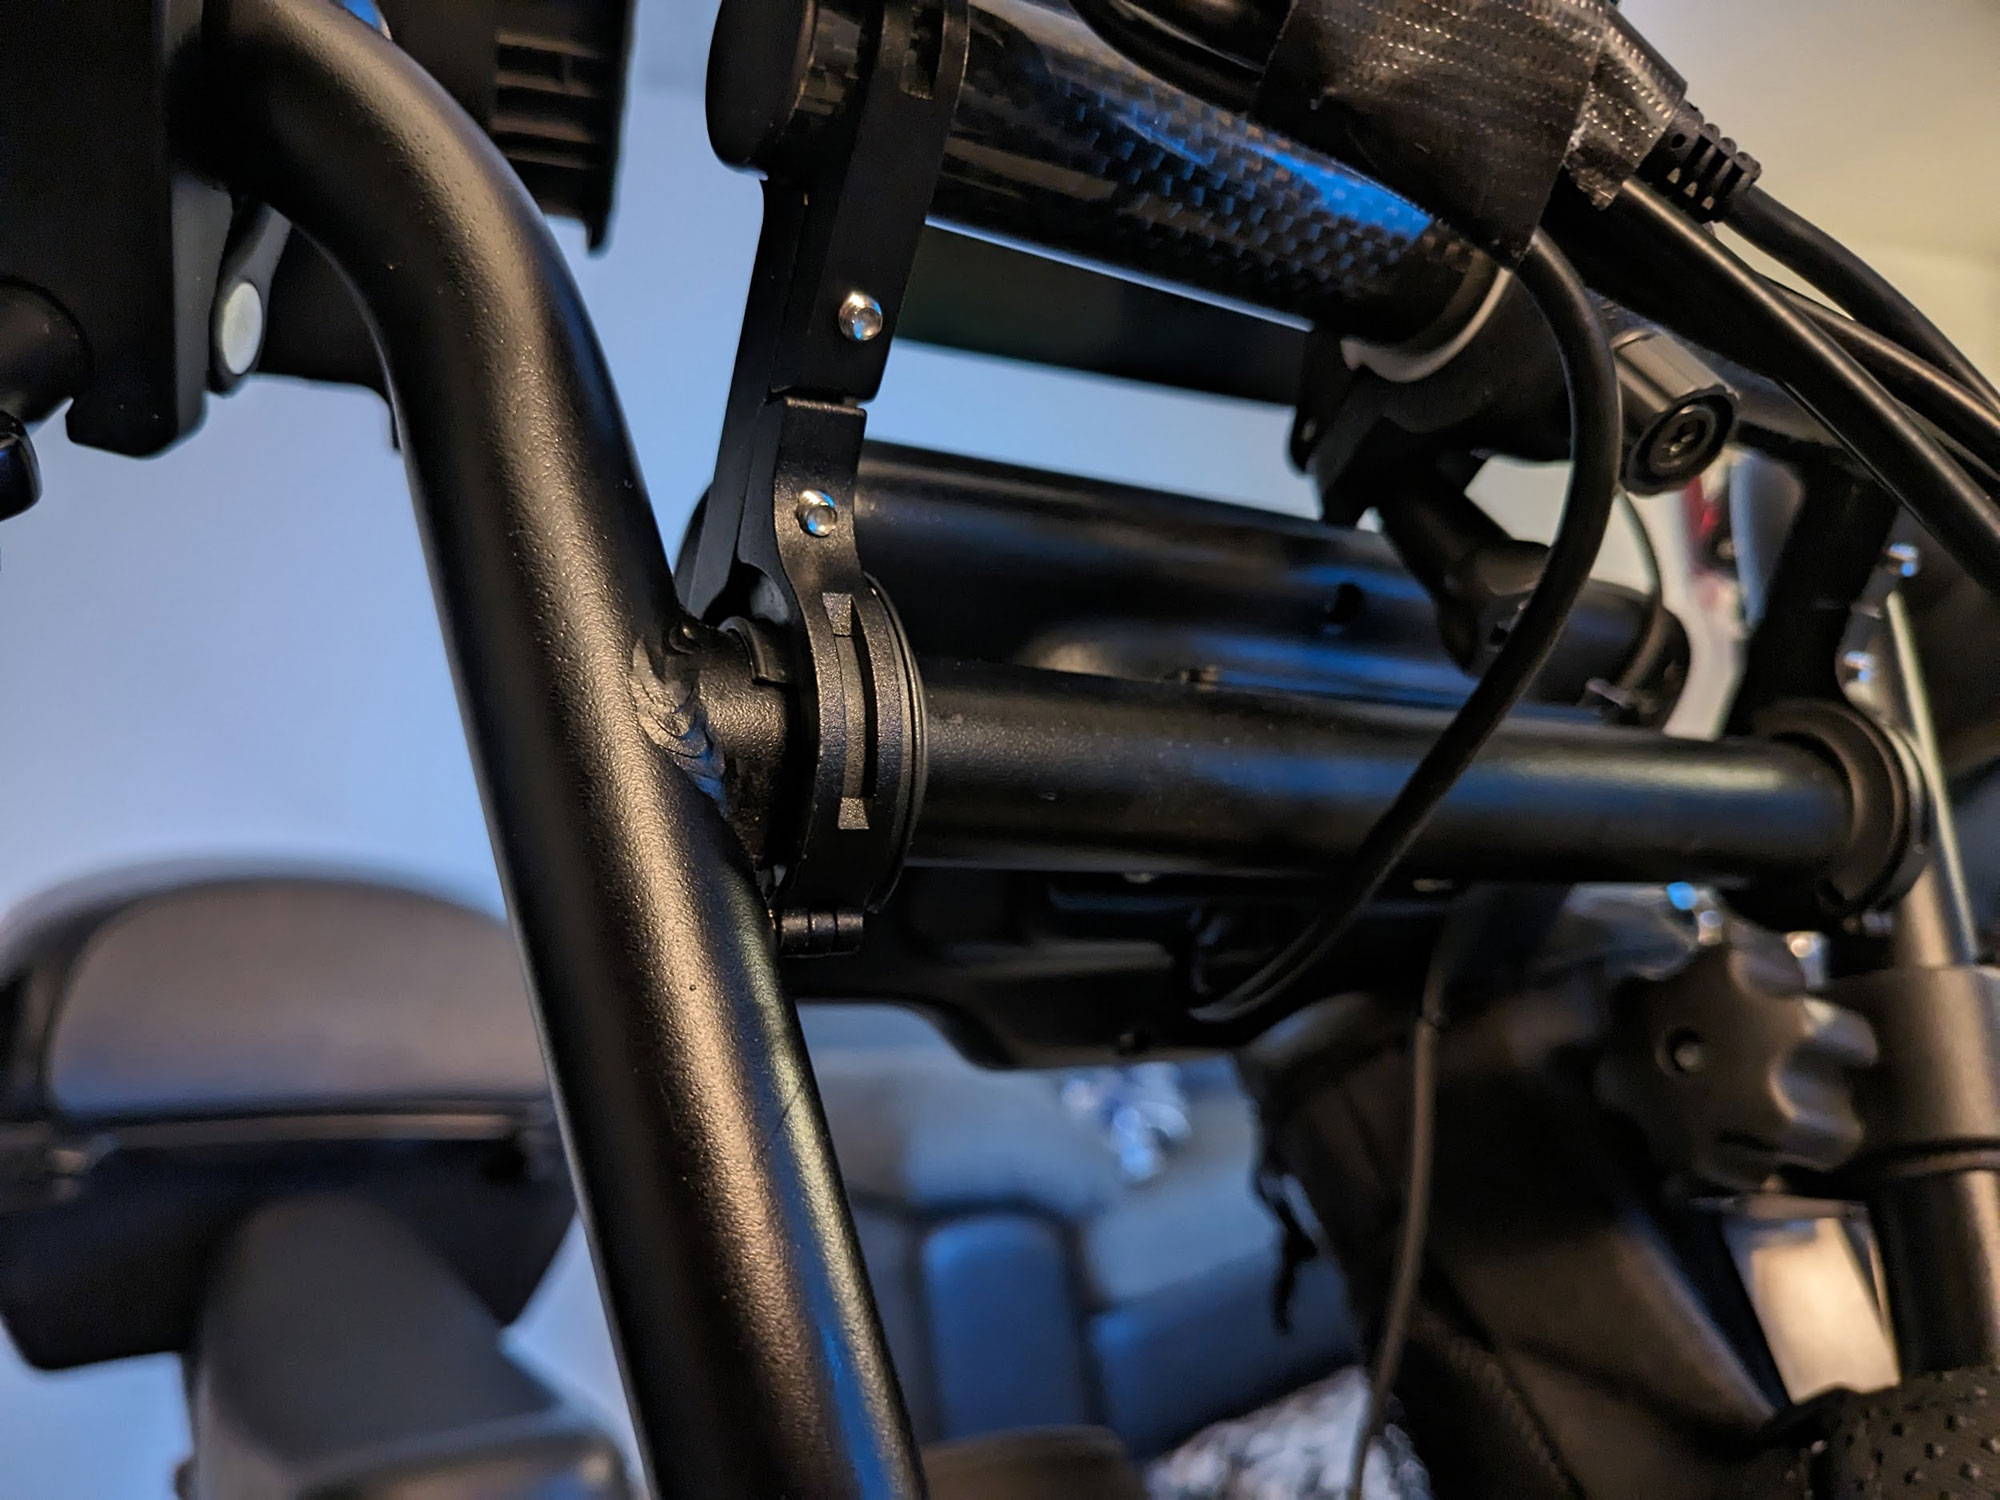
I started from the top of the E-Bike, as I knew from previously riding an E-Bike that I didn’t want to use regular E-Bike mirrors because I didn’t like how the mirrors would move all over the place if I was on a bumpy road. I also didn’t like having to constantly look over my left & right shoulder to make sure that a car wasn’t in my blind spot which lead to me having to take my eyes off of what’s in front of me. While looking online for an alternative. I ended up Amazon & came across the FEISIKE Handlebar Bike Mirror, Bicycle Rear View camera with 4.3'' HD Night Vision Function. The rearview camera was a perfect solution for my problem. It has a 4.3 HD night vision screen that’s in color and It covers a wide view that keeps me from having to turn my head at all. Now I’m able to keep my eyes forward and focus on what is in front of me. The color night vision is awesome. It is very bright and it shows very clear. Its makes driving at night so much easier. I was able to mount the rearview camera to an Elifeparts Bike Handlebar Extender. This is exactly what I needed to complete this task. The Bike Handlebar Extender also can be used for a variety of purposes, such as mounting lights, mobile phones, GPS devices, and other accessories.
I simply hooked up the extender bar to the handlebar on the G50, needing only to snap it in place and tighten it with the provided screws. I then placed the monitor on the bar, snapped it in place and tighten it down with the screws provided. I attached the rear view camera on the back bar of the seat and tighten it down. I ran the camera cord the same way that the other cords on the bike goes & I used the velo straps that came with the camera to secure it with the other cords. I then plug the cord into the screen and that was it. The process took less than 15 minutes to complete.
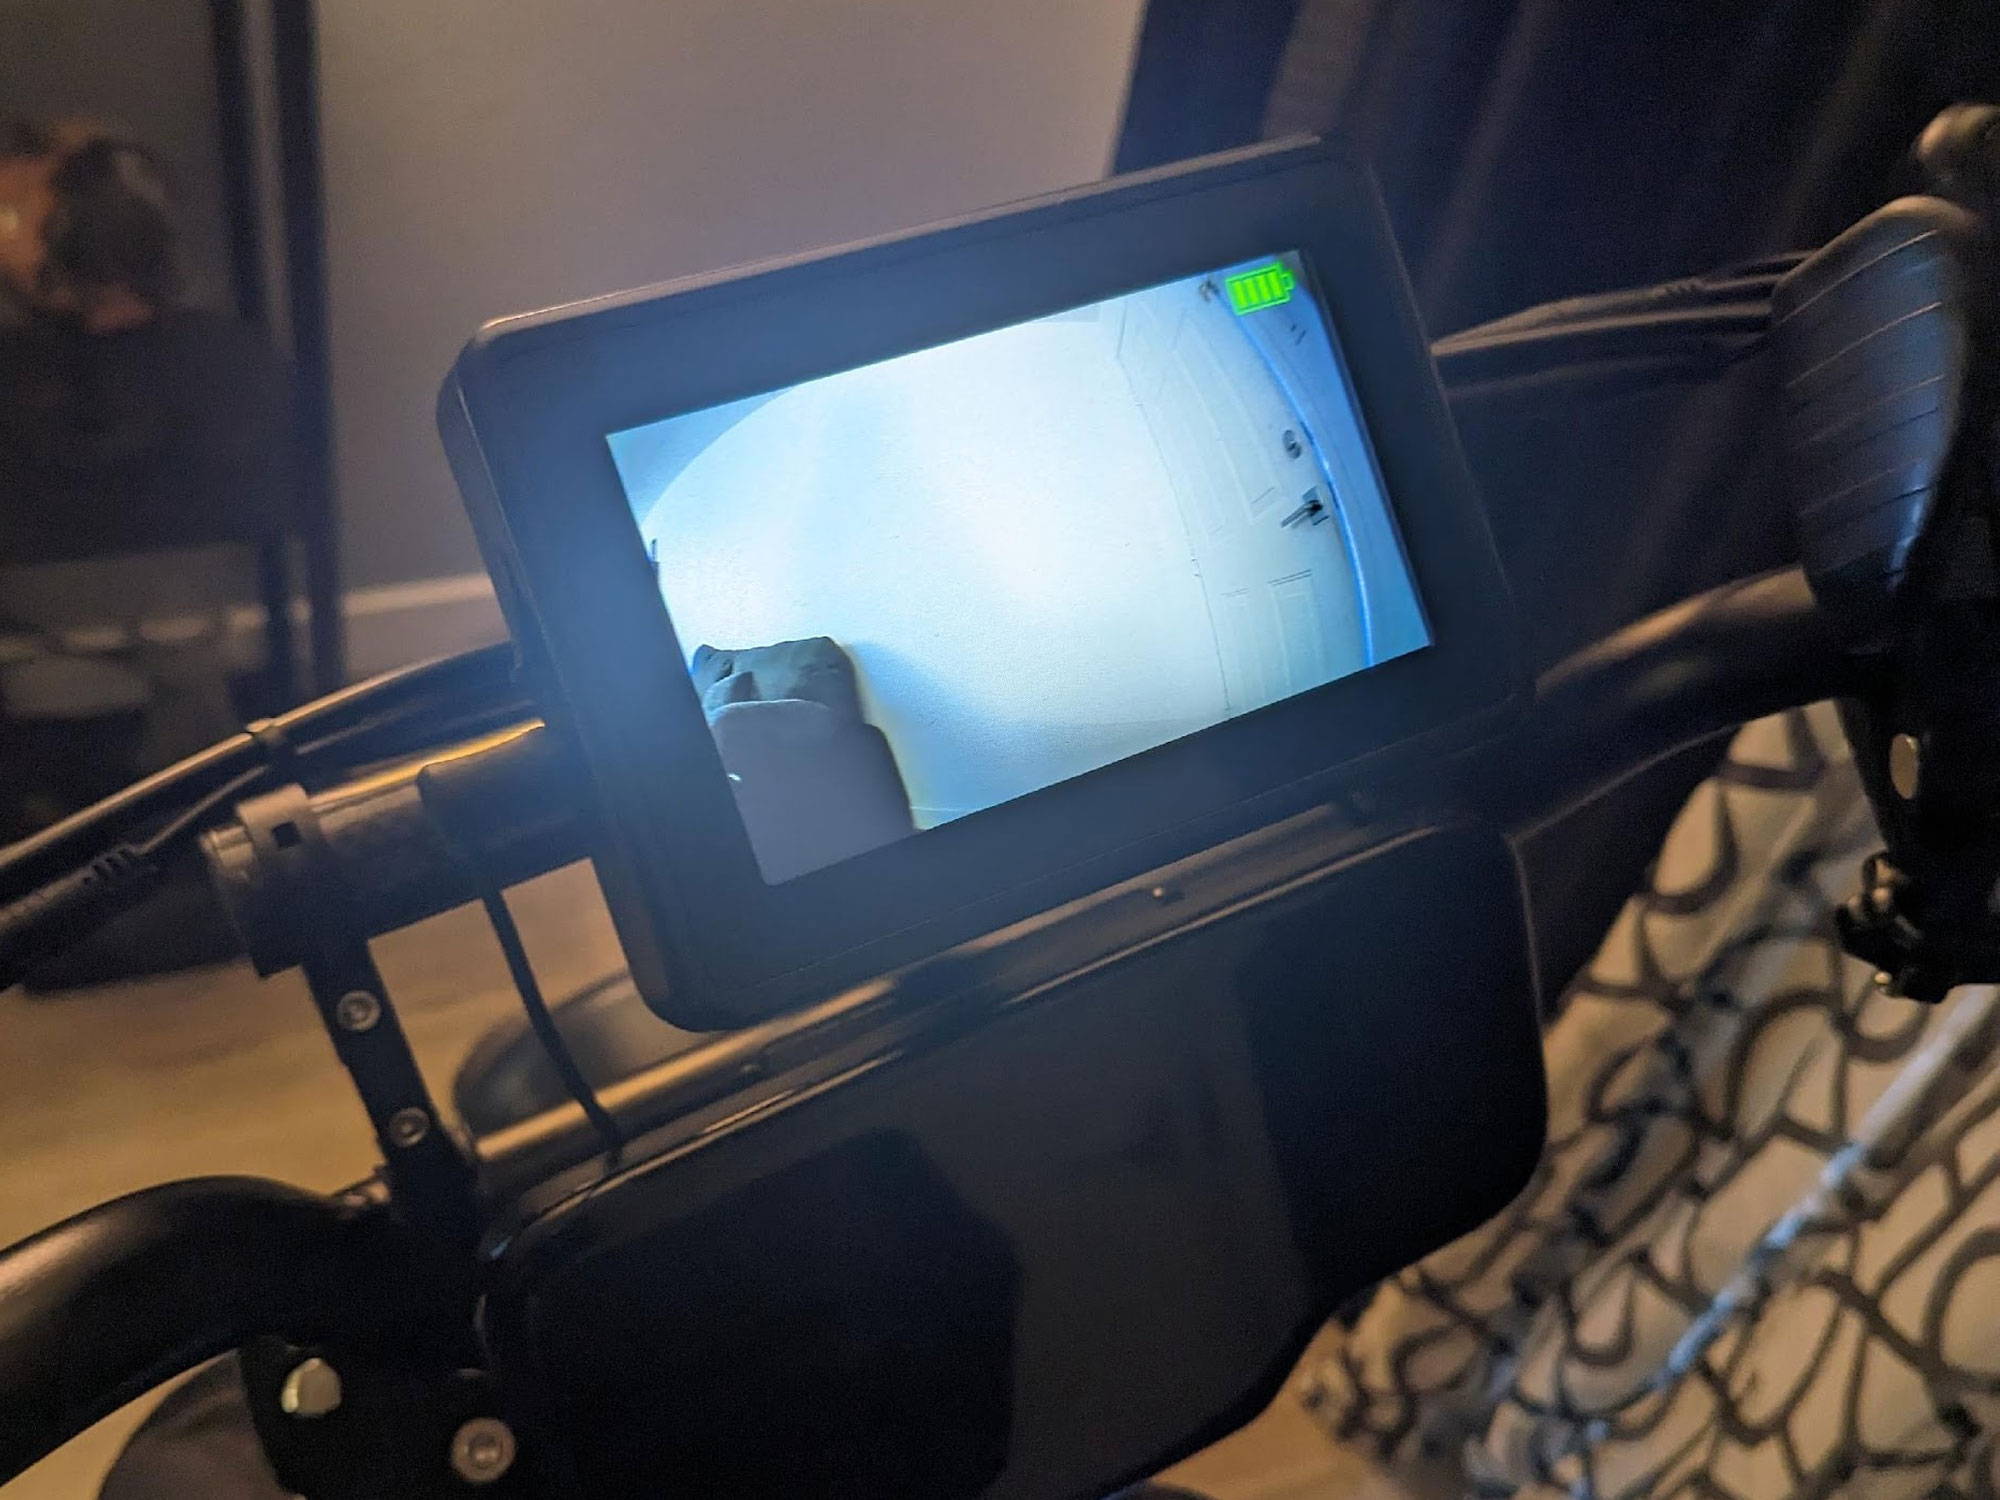
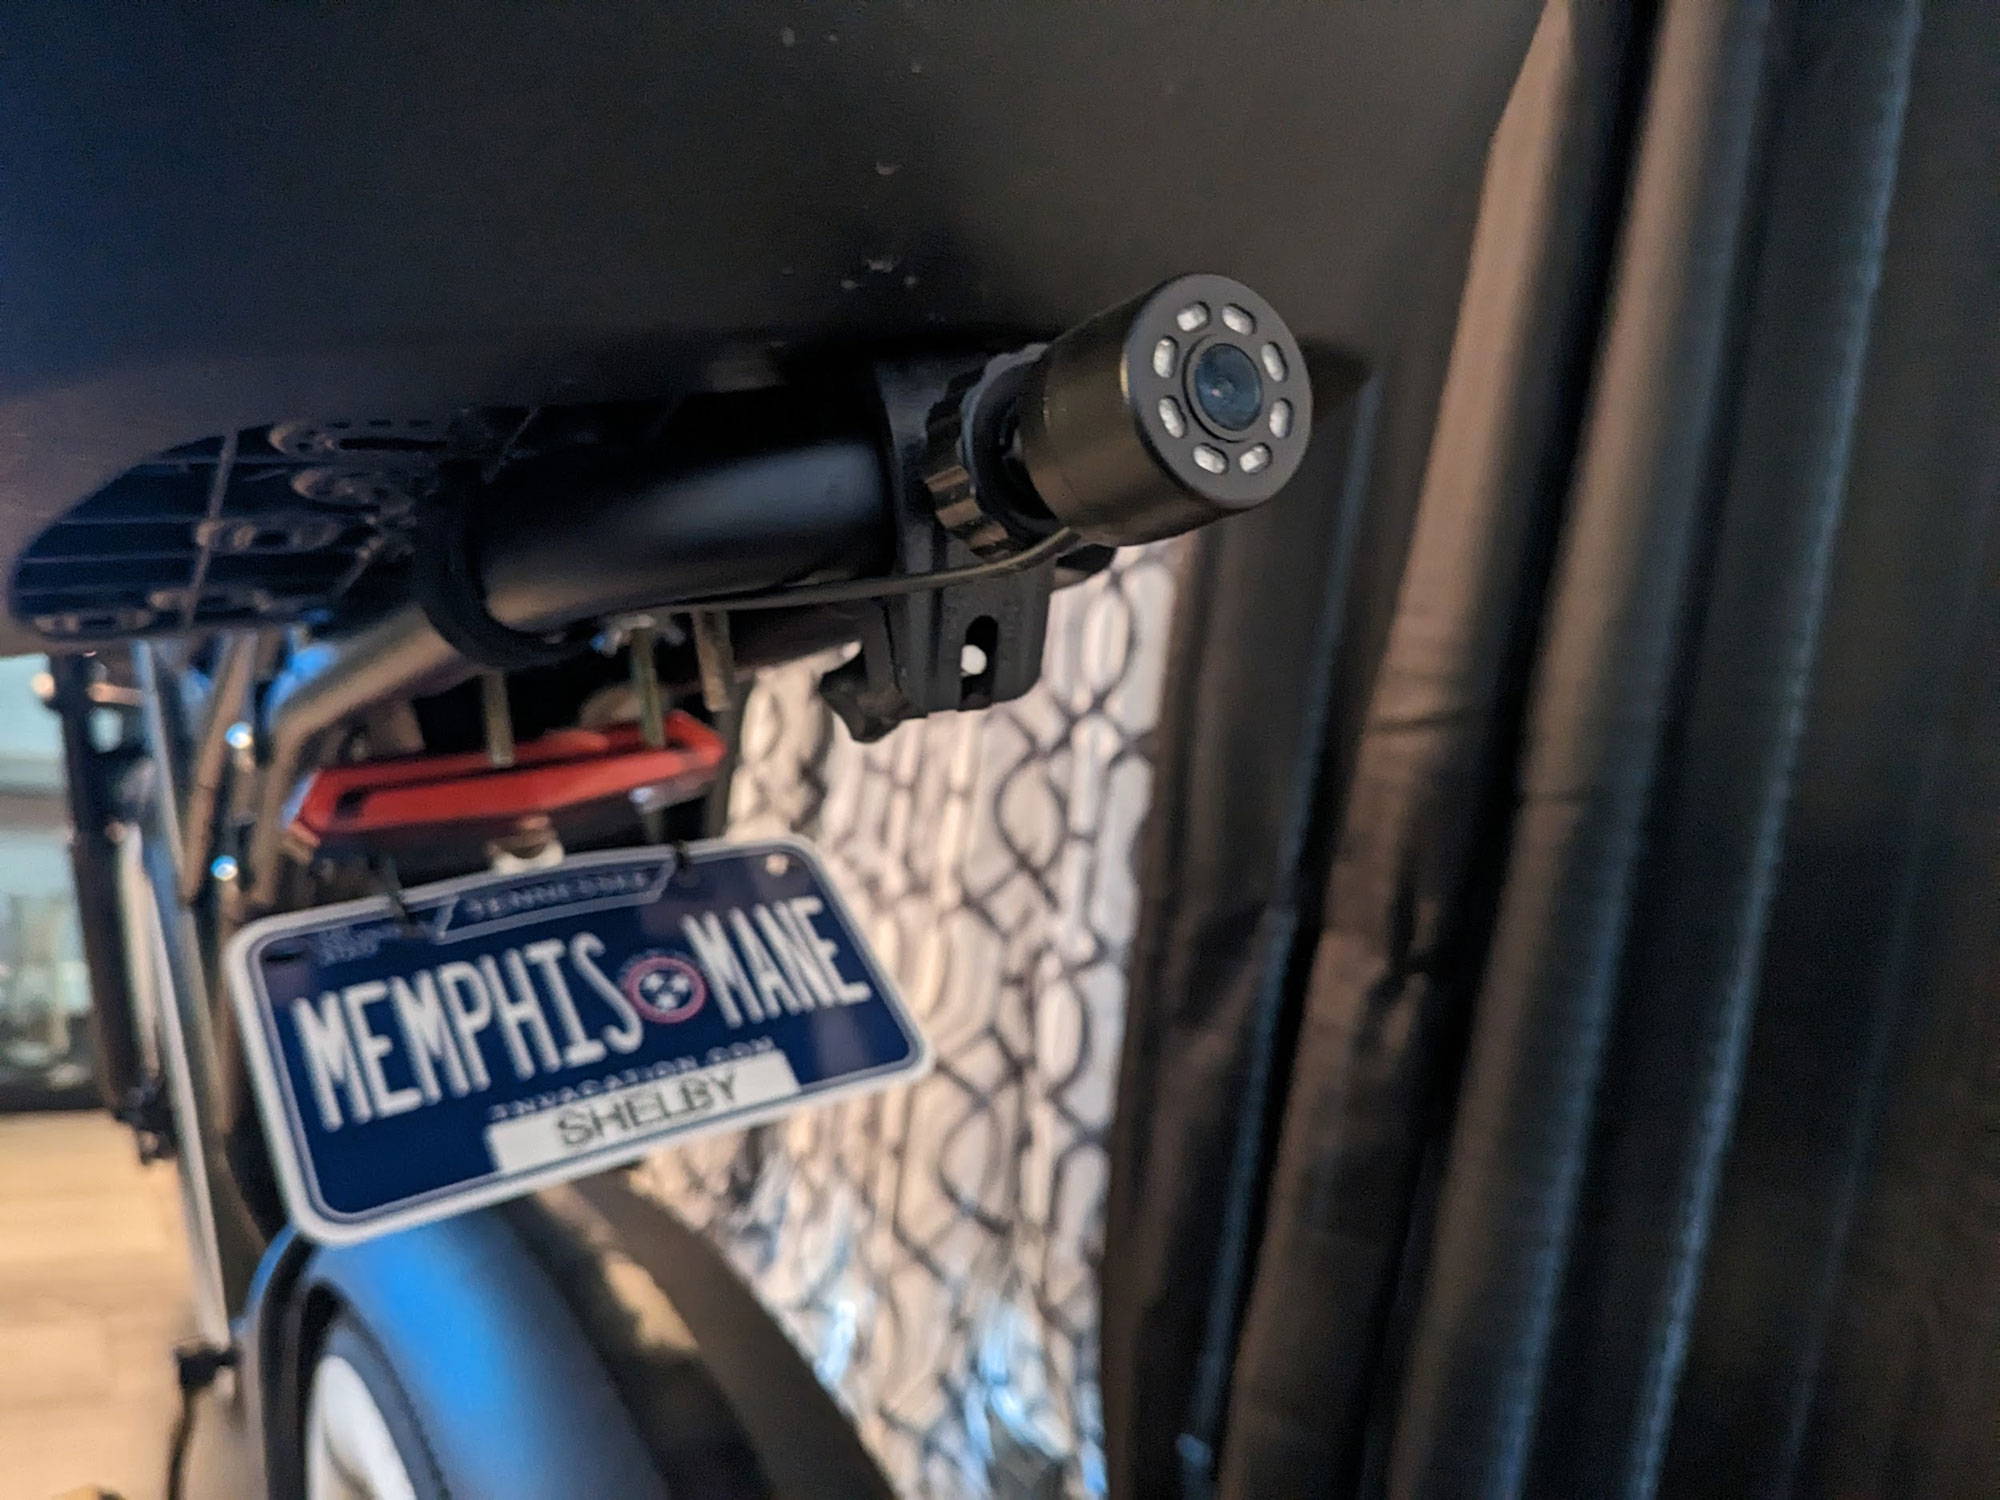
Electric Bike Rearview Mirror
Solving Storage Problems
As I continued to think about what else do I need to make my commute as comfortable as possible. I started thinking that I knew I needed a bottle holder but it would great if I could find a bottle holder that was thermal insulated. I wanted something that would keep my liquids cold on those hot summer days and keep my liquids hot those cold winter days & nights.
So my search online continued and I came across the 4-FQ Cup Holder for Motorcycle, Bike Cup Holder Handlebar with Alligator Clamp ATV Cup Holder Bicycle Drink Holder. This bottle holder is exactly what I needed. It keeps my liquids cold & keeps my liquids hot. It simply gets the job done. It holds very well with the Velcro strap and alligator clamp. It also has a stable steel plate to hold my bottle in place. Simply Tighten the alligator clamp around the bar and wrap the side Velcro strap around the bar. It sits perfectly and doesn't move.
Electric Bike Drink Cup Holder
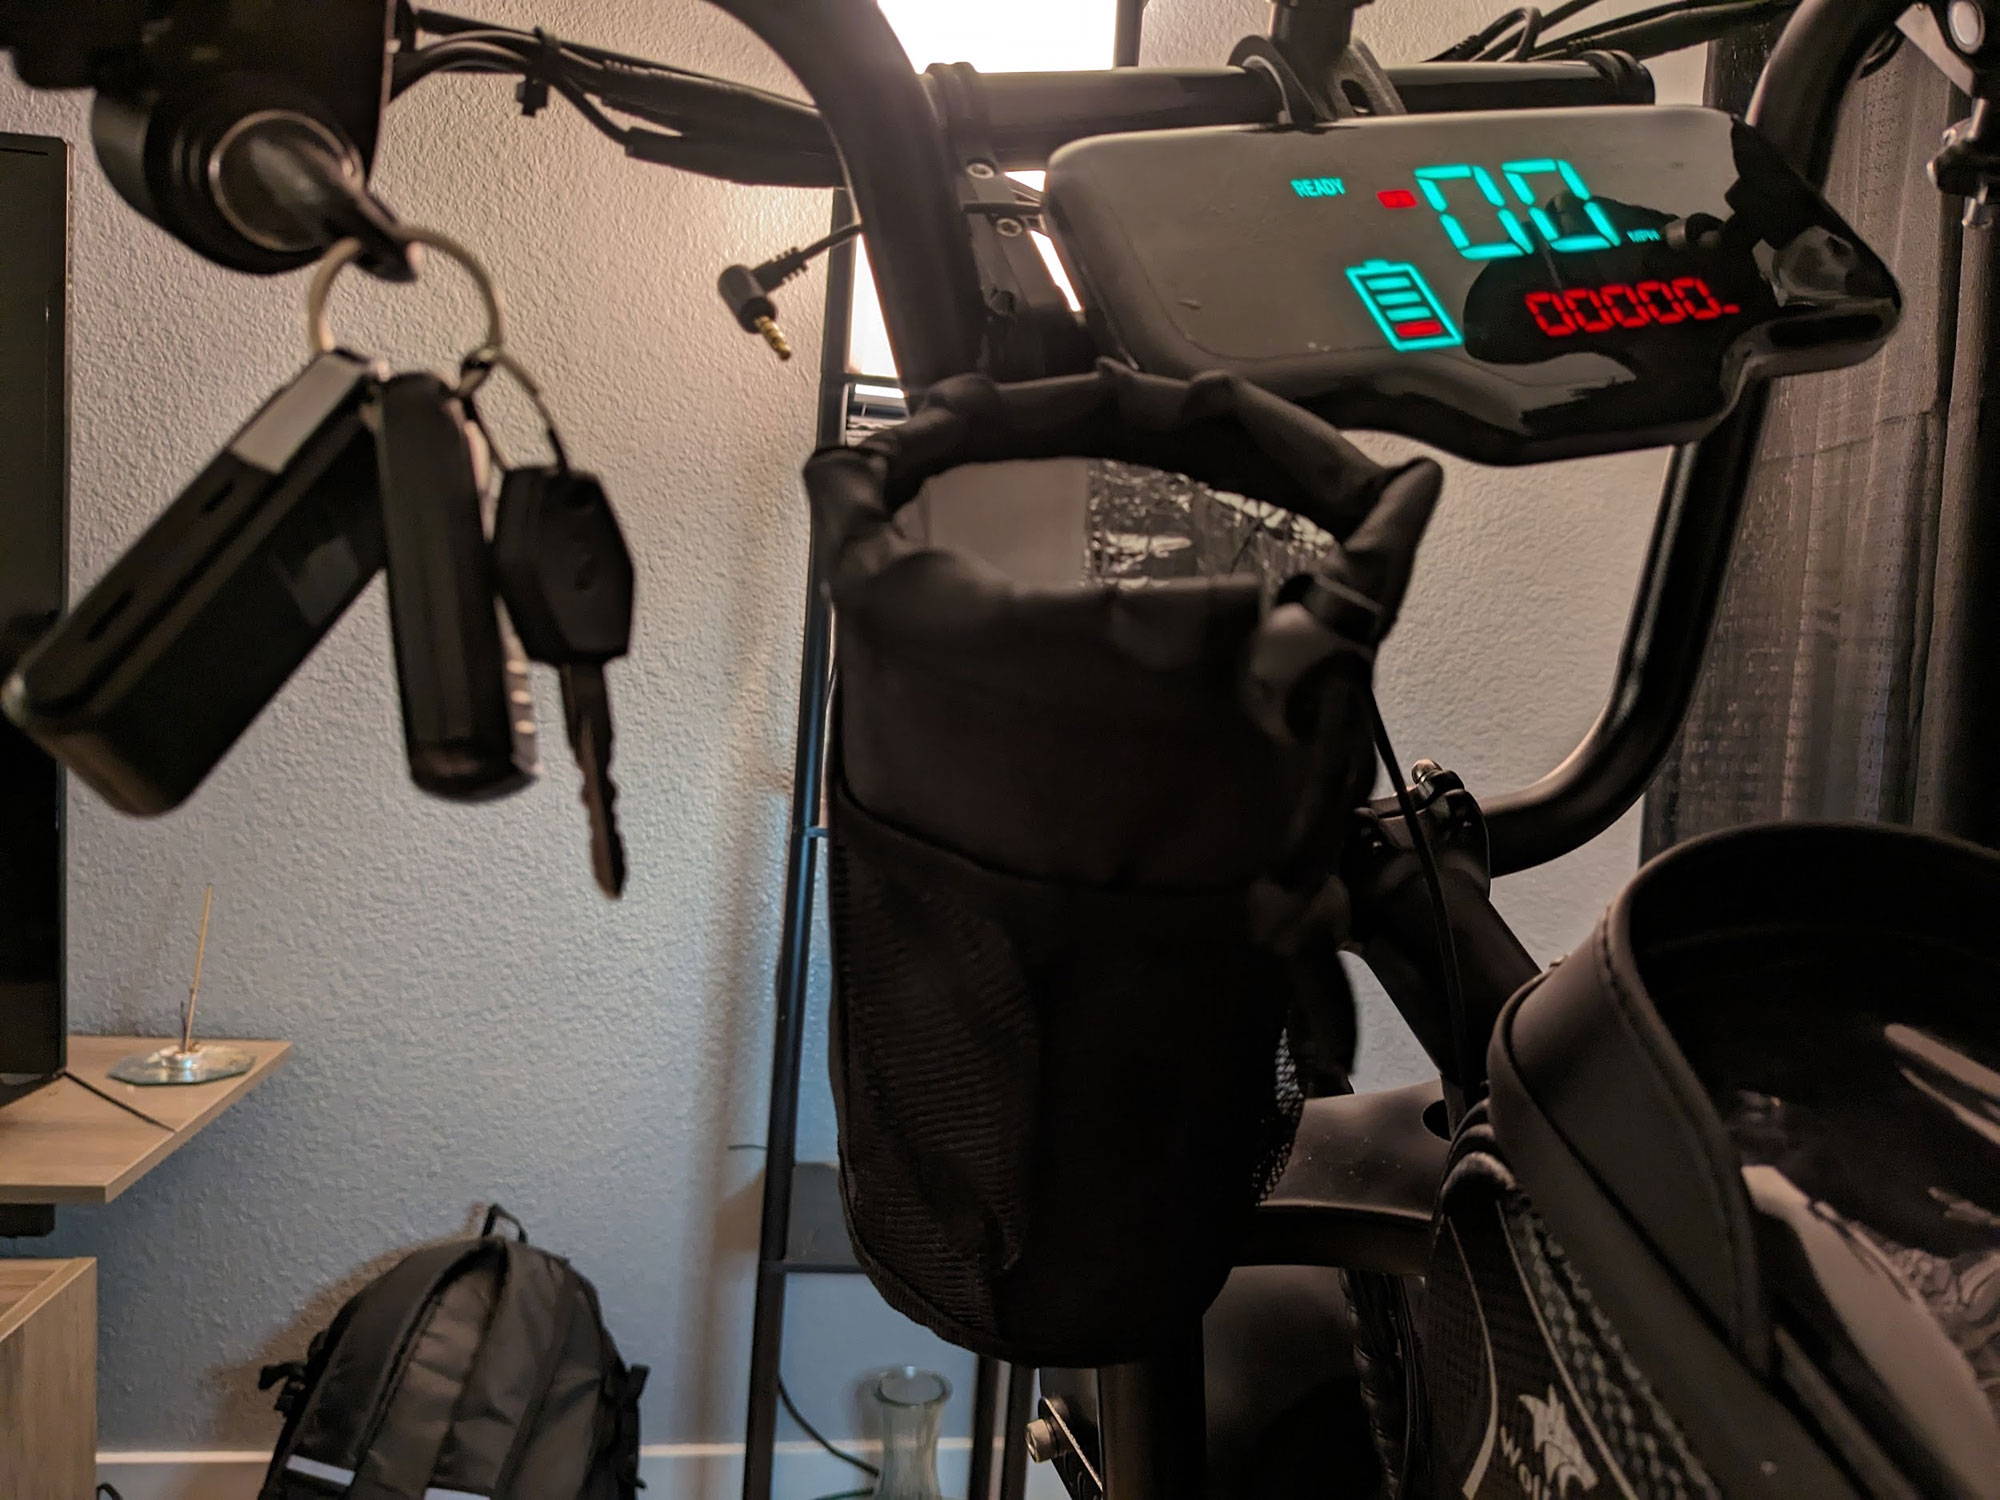
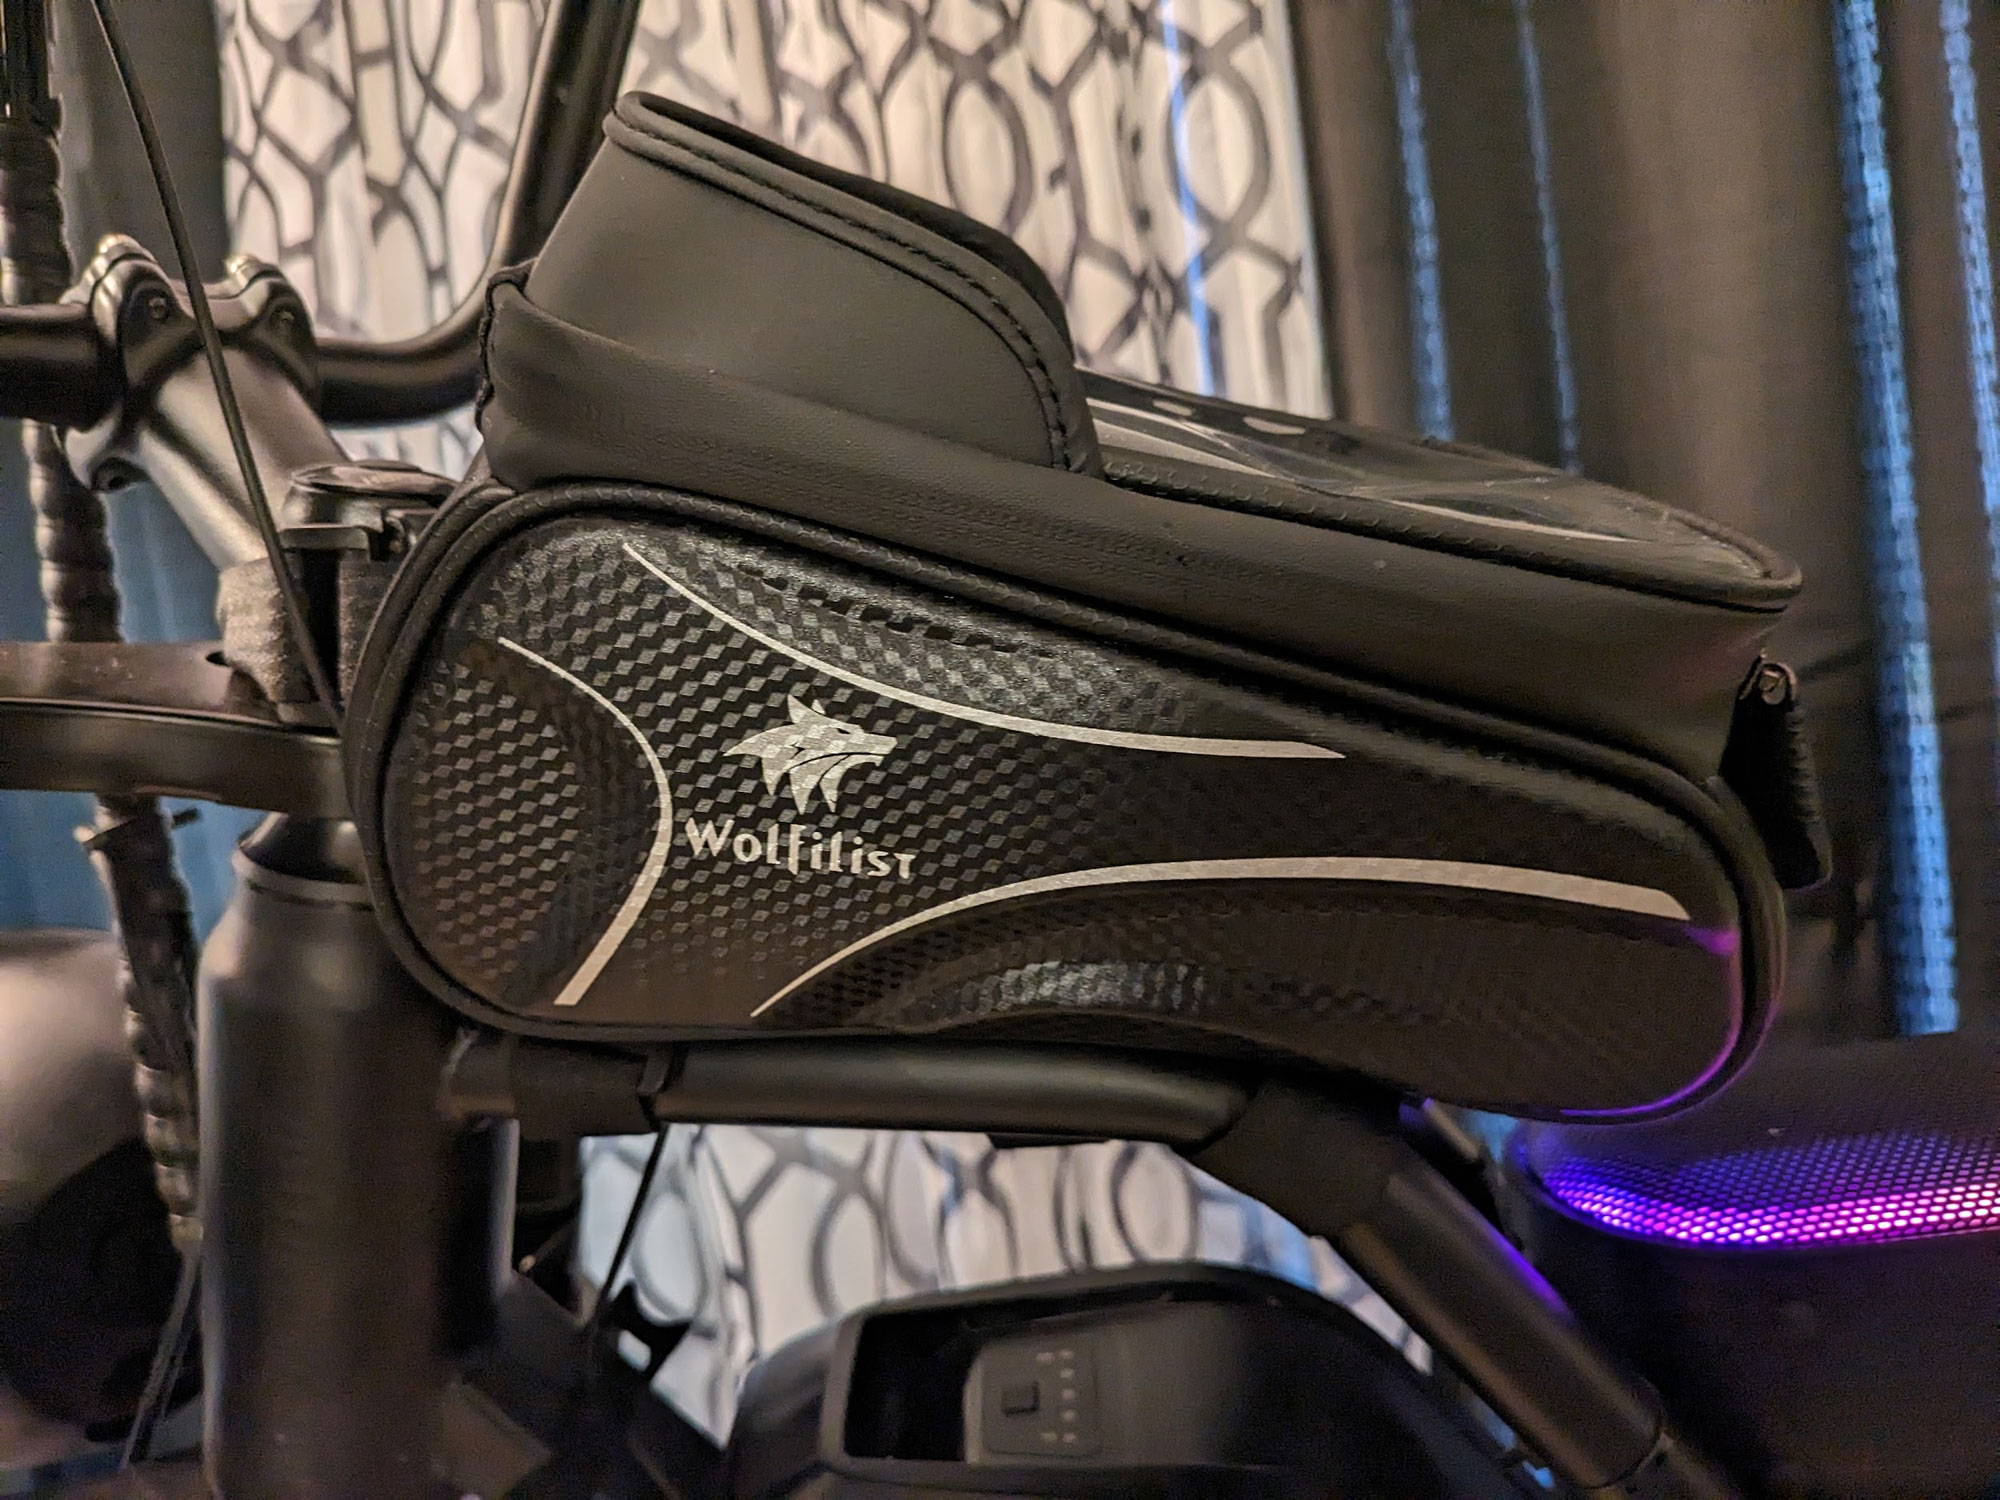
After I found the perfect bottle holder to fit my needs. I needed to solve my small storage solution. I wanted something that I can put keys, wallet, phone and other personal items while I'm riding. I didn't want to carry anything in my pocket and risk losing anything. I wanted a place I can put my phone and still be able to see it if I get a call or text message. I didn't want the hassle of pulling my phone out my pocket when I didn't have to. I went online and read the reviews. The WOLFILIST Bike Bag, Waterproof Bike Frame Bag with Sun-Visor Rain Cover, Bike Phone Holder with TPU Sensitive Touch Screen solved my small storage issue. This bike bag is awesome because I was able to put it in the perfect spot on E-Bike frame. It hold my keys, wallet and other Small items. Its very sturdy and the Velcro straps keeps it in place. It has a separate part inside the bag to put my phone. I'm able to see who is calling & texting me. The best part about it is that I'm able to text without pulling my out the bag because it is TPU sensitive touch screen. The bag is waterproof so I don't have to worry about my phone and other items getting damaged. The bottom Velcro straps made was in the perfect location & made it easy for me to install. Simply put the bike bag on top of the E-Bike frame and strap the Velcro straps around the bars.
Electric Bike Waterproof Phone Bag
Adding Music and GPS for an Enjoyable Commute
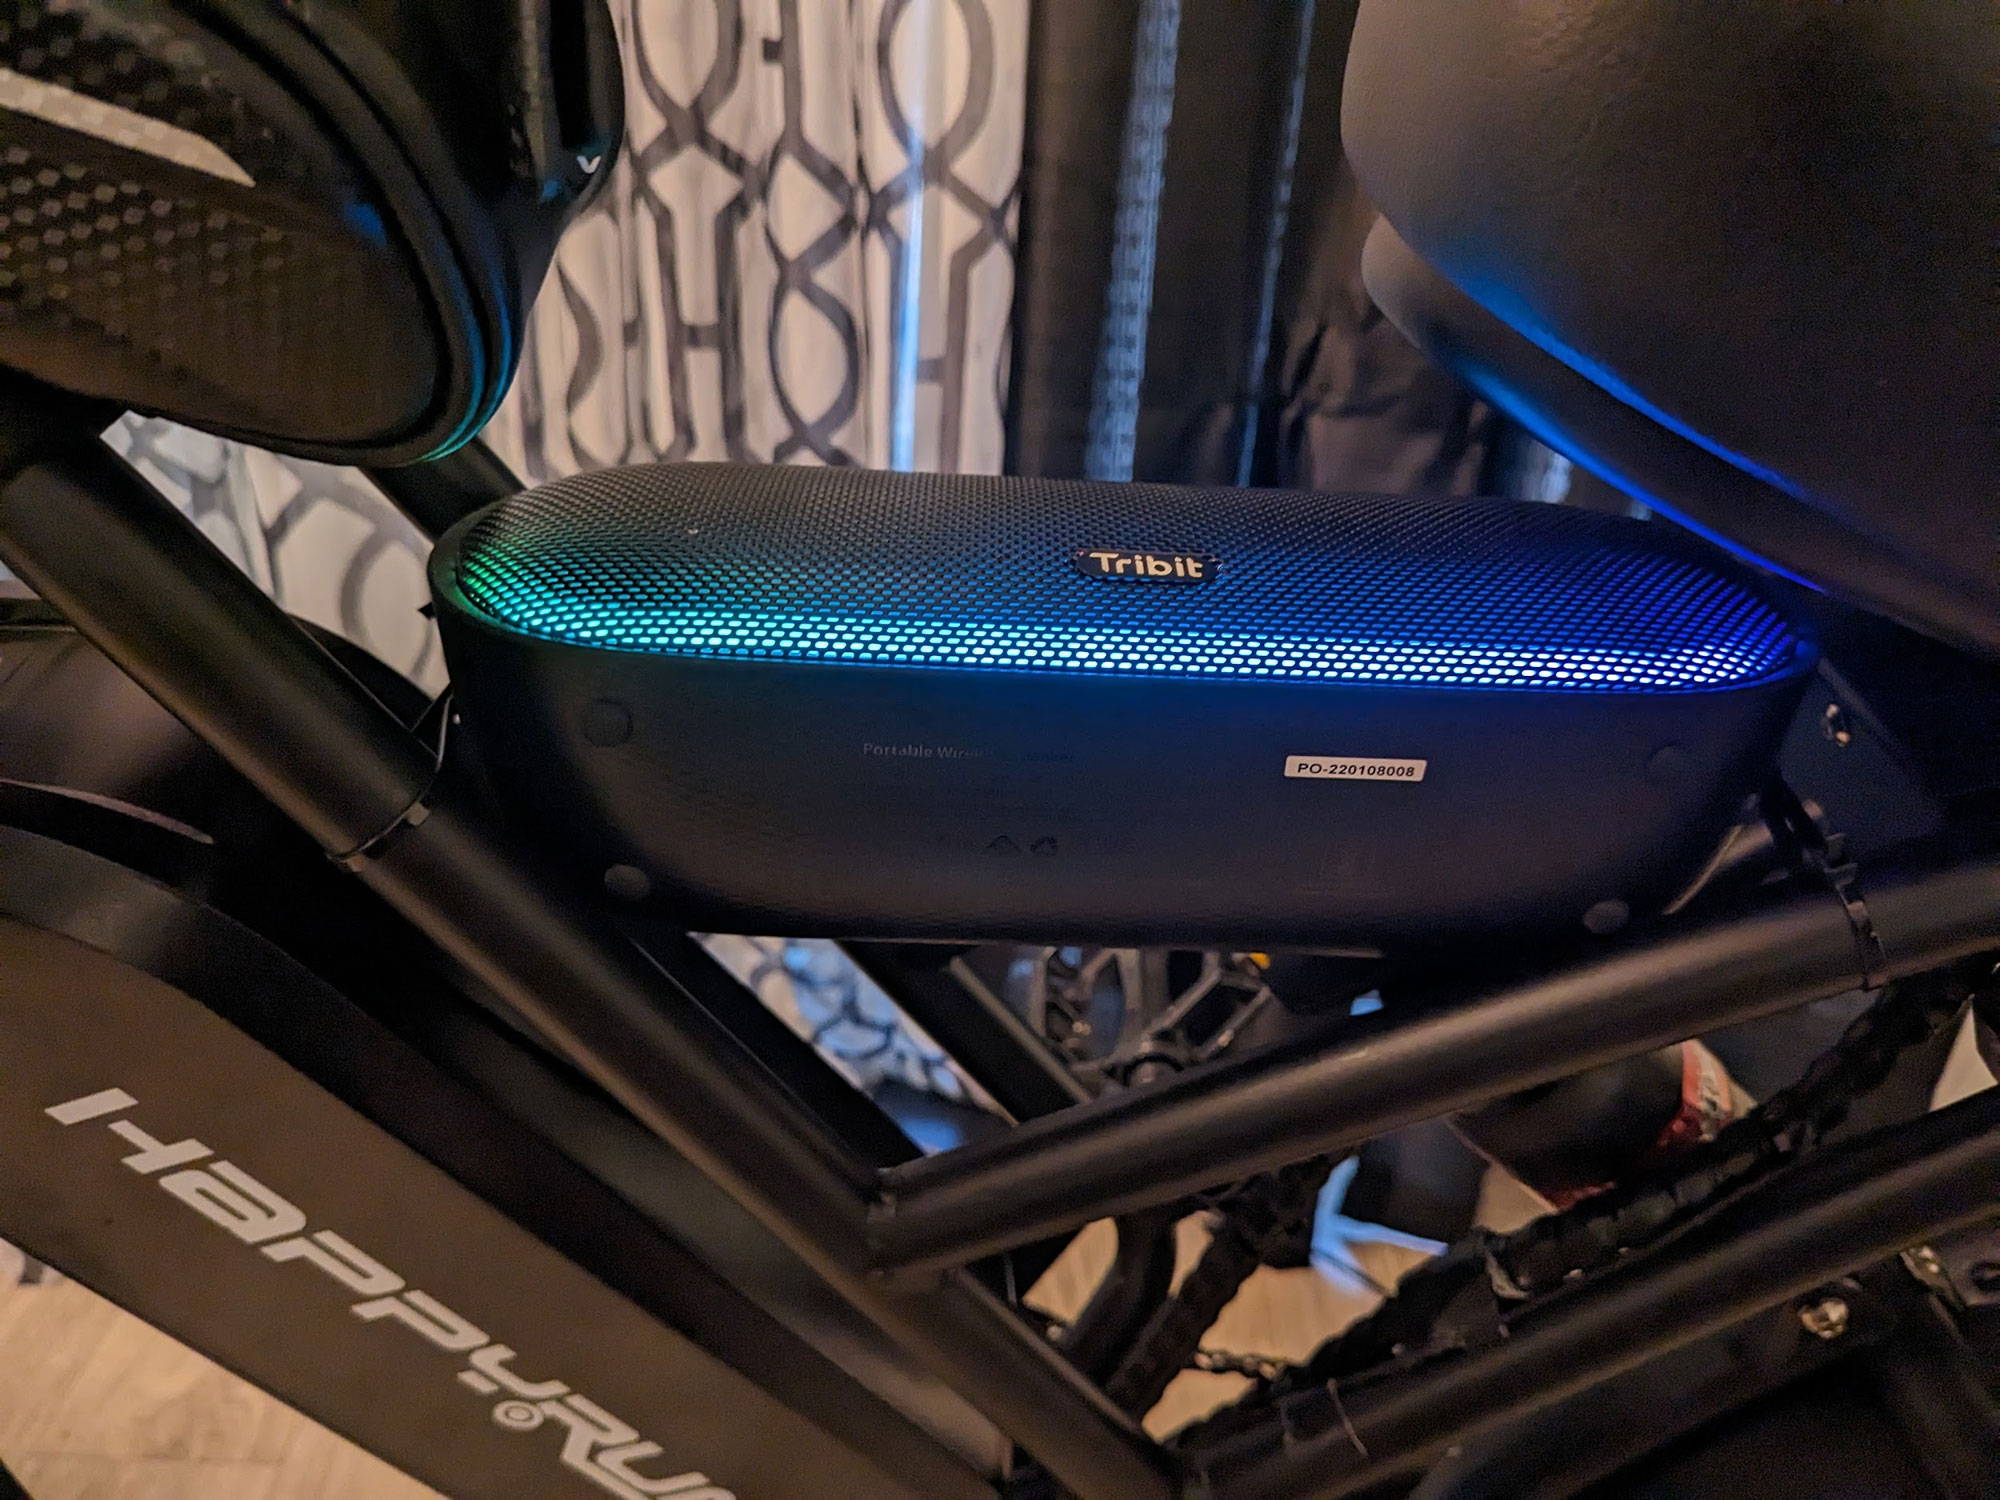
Now that my HappyRun G50 was coming along well. I started thinking that if I'm going to be using my HappyRun G50 as my daily commuter and riding it over 15 miles a day that I wanted my commute to be enjoyable. I wanted a speaker to listen to music as I ride so my commute won't be long and boring. I had a great location where I wanted it. I just need the right speaker to fit in place. The Tribit XSound Mega portable Bluetooth Speaker was perfect. It fit exactly in the location I wanted. This speaker is amazing. It is Loud with Deep Bass, Titanium Drivers, IPX7 Waterproof & LED Lights. I love this speaker because it is loud for me to hear while I riding. The wind that is blowing and the traffic that is around me doesn't take away from the amazing speaker sound.
Electric Bike Speaker
Once I got the speaker in place. I knew that a GPS was much needed because I wanted to know the bike routes for my commute. I didn’t want to use my personal phone because I wanted to make sure that it always had a good battery percentage. I decided to use my old android phone to use as my GPS & my music player for my speaker. To make this work I had to download the Google maps to use offline & download my YouTube playlist to use offline. It worked out perfect. The only problem was since I was using the bike bag for my personal phone. I needed something to mount my old phone for my GPS and music player. The problem was solved as I ordered the ORNARTO bike phone holder. I really like this phone holder because it holds my in place very with the alligator clamp. I'm able to rotate my my as needed and it doesn't move. The process to install it was simple. I only put the alligator clamp around the bar and tighten the screw on the back down as tight as I could.
Personalizing with a Mini License Plate
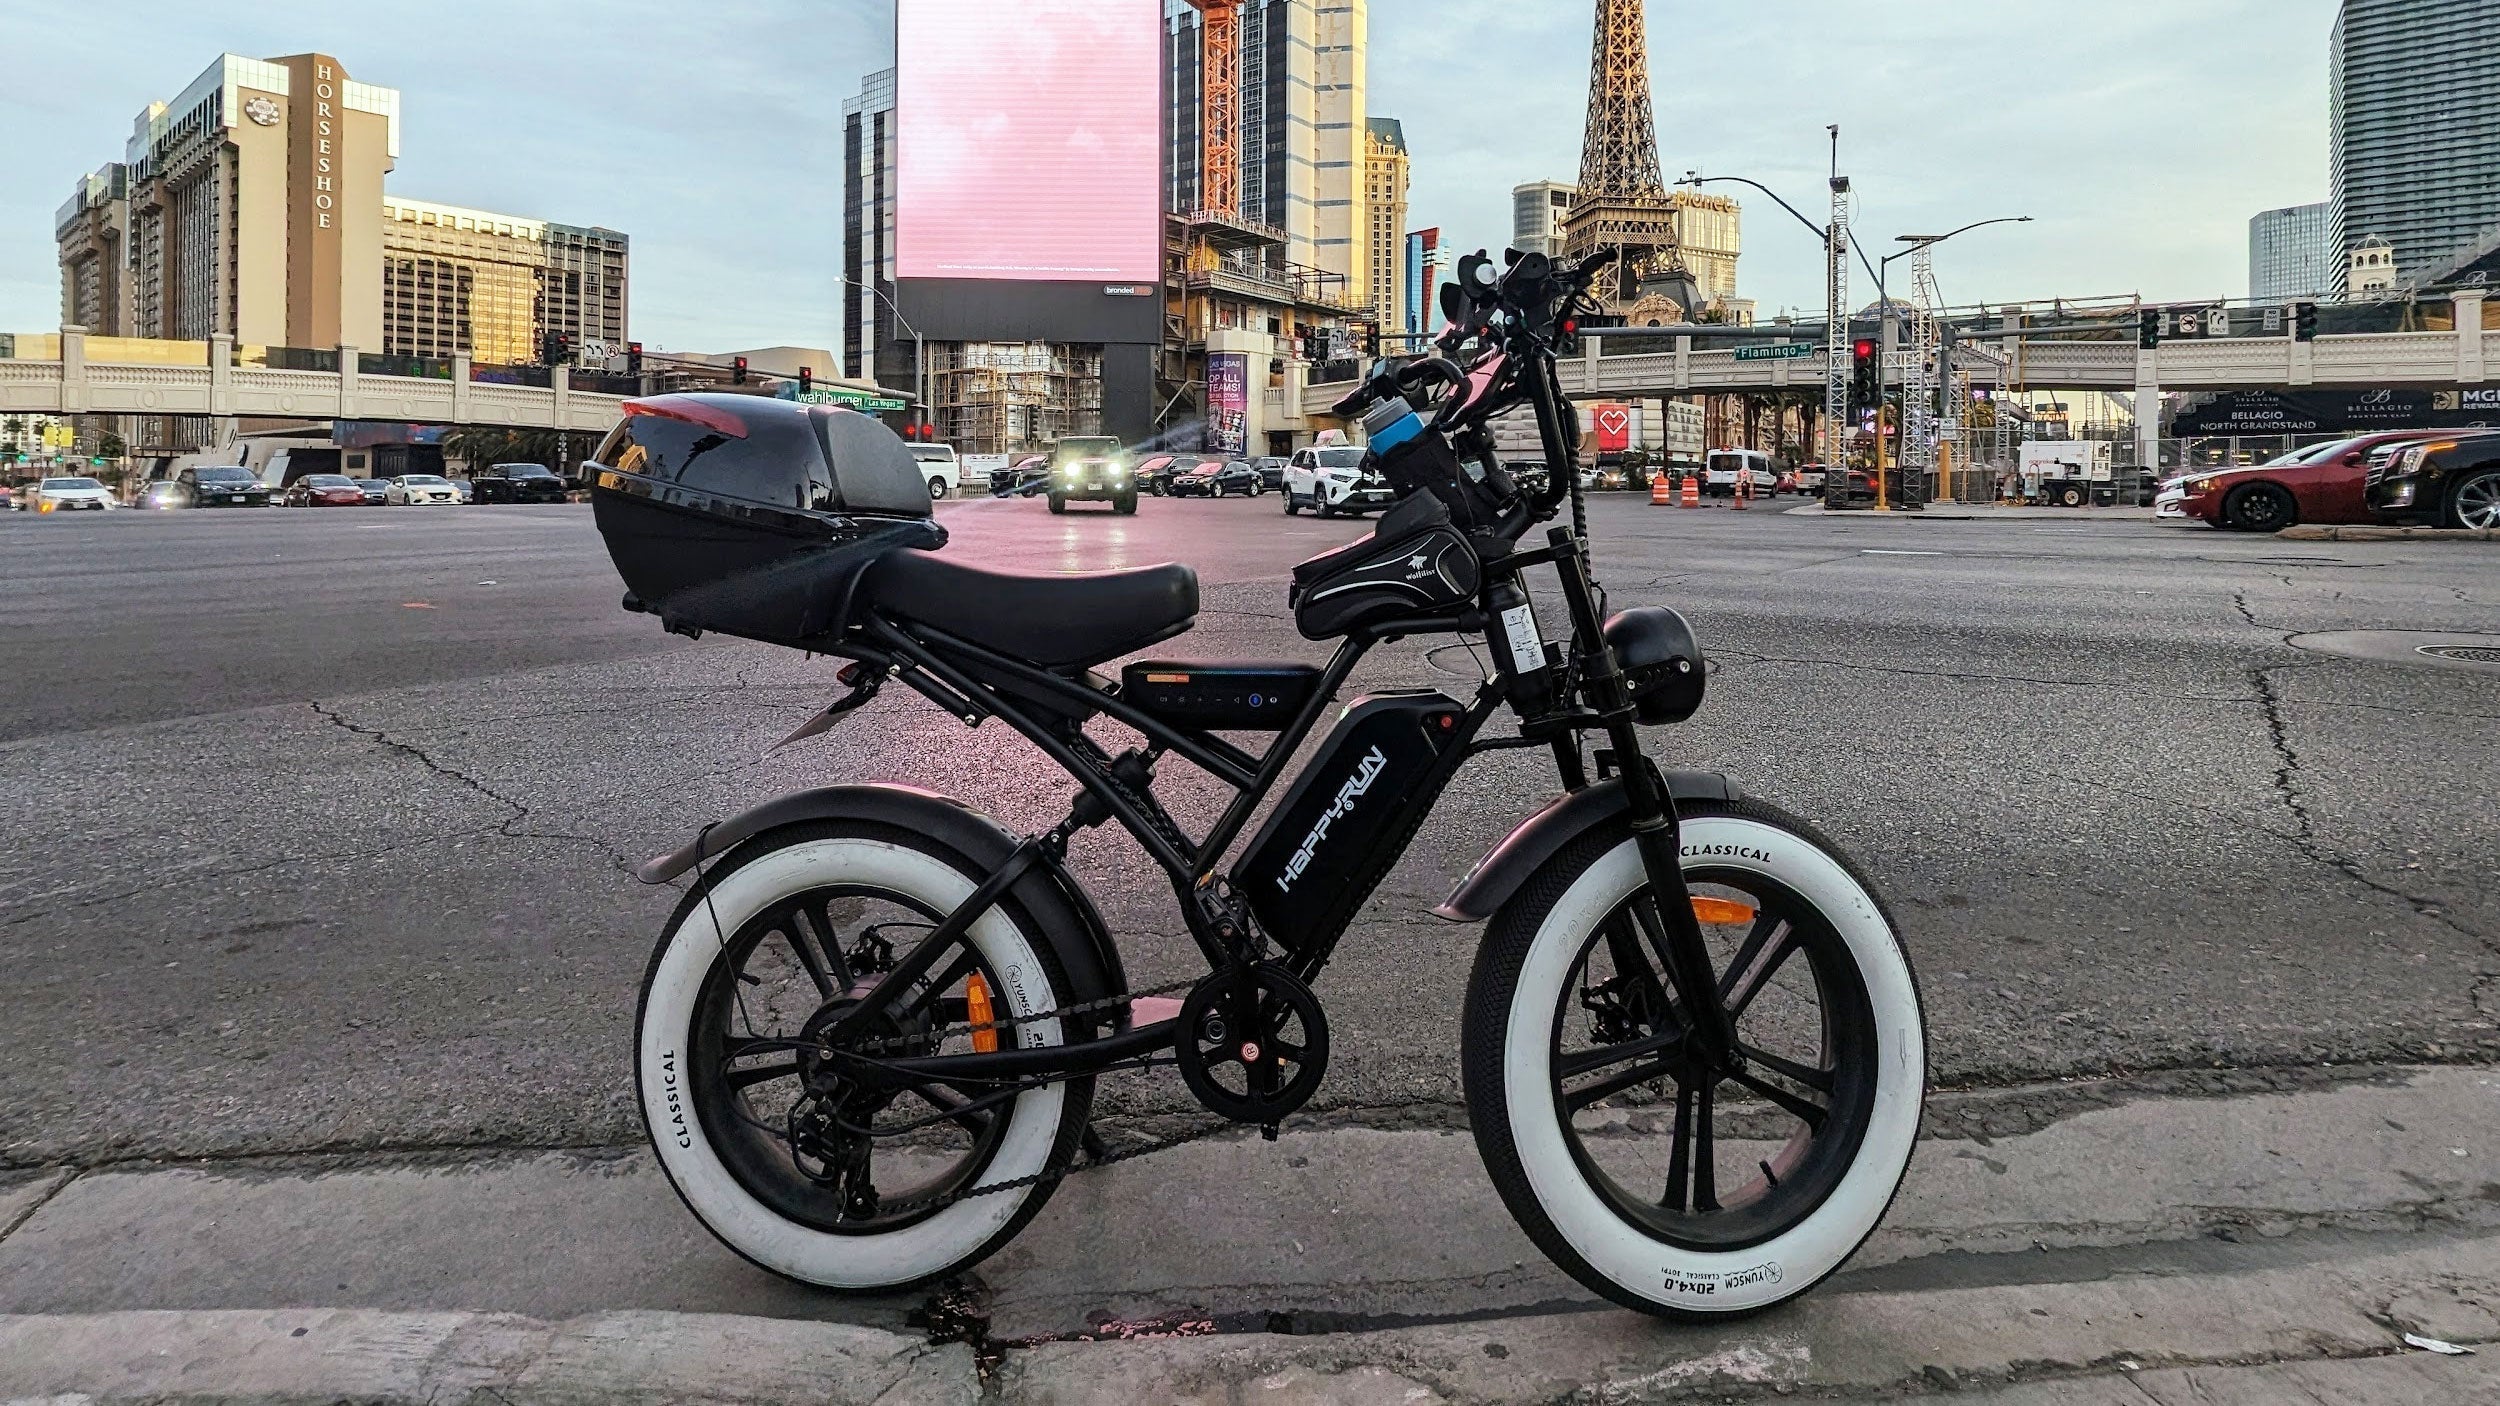
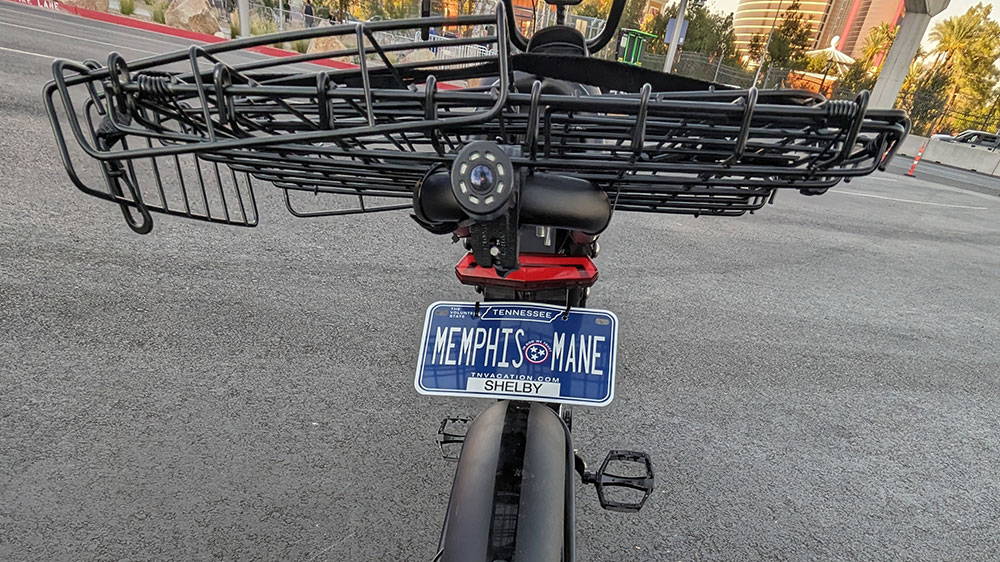
The HappyRun Tank G50 is a beautiful E-Bike & the fact that it has a place to put a license plate tag makes it stand out more. I couldn't let the opportunity to personalize a tag to add to the customization of my E-Bike. I searched online and found the Personalized Mini License Plate 4X7 Custom Motorcycle Sized Tag on Amazon. They have all 50 States and they look exactly like real license plates. The license plate is metal and not plastic. The license plate doesn't look cheap. It took about a week to get it because I had mines customized. The license plate comes with holes in it so you can add screws to hold the plate. The problem for me was that the holes didn't line up to the ones on the G50. So I just used zip ties to put on the license plate. It looks great and you can't tell that I used zip ties.
Mini License Plate
Boosting Security for my E-Bike
Adding Alarms and Locks
The customizations that I made so far were beginning to stand out. The HappyRun Tank G50 comes with a key for the ignition and a lockable removable battery to help with theft. I felt like I needed more security since I live in Las Vegas,NV and I knew that E-Bikes theft had went up. I did some research on securing E-Bikes and found out the besides using U-locks that it is best to use alarms and bike chains. I went online and ordered 2 alarms. The first alarm is the wsdcam 113dB Bike Alarm Wireless Vibration Motion Sensor Waterproof Motorcycle Alarm with Remote and the second alarm is the PADONOW Wireless Remote Bike Alarm: 115dB Super Loud Bicycle Vibration.
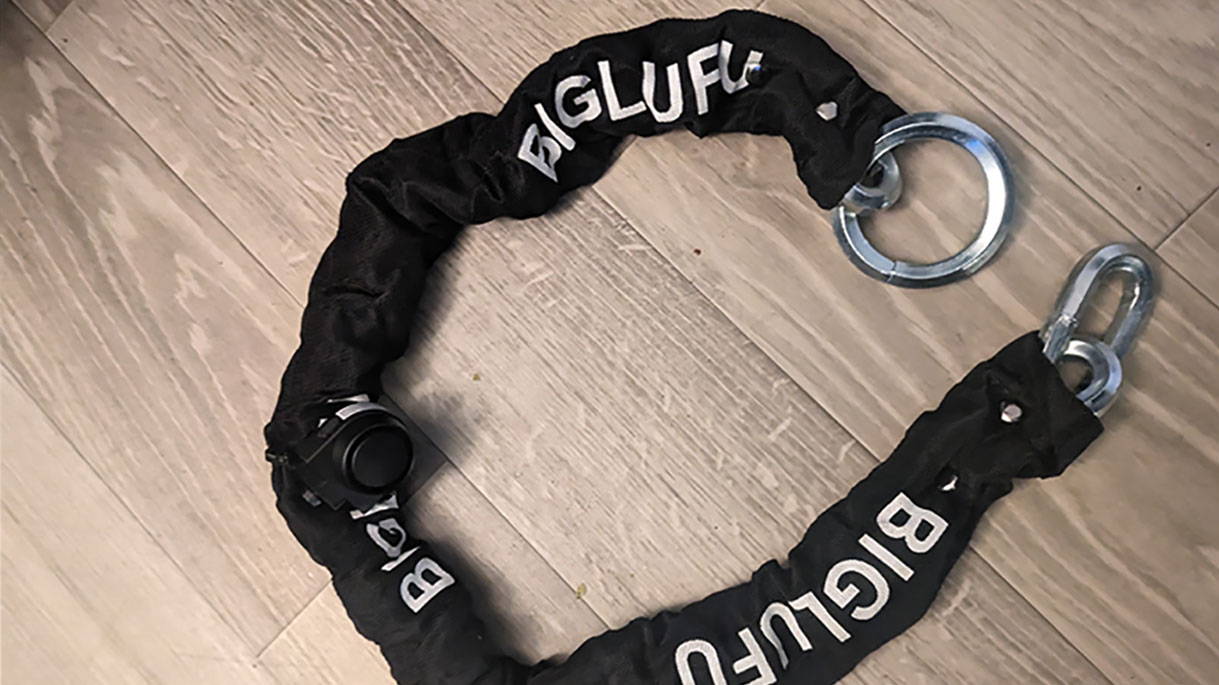
Once I received the alarms. I immediately started looking for a place to put them and make It so it is not easy to find. I decided to place the first alarm on the left side under the seat. The 2nd alarm I thought that I should get creative. So I decided to attach my 2nd alarm on my BIGLUFU Motorcycle Lock Chain Locks Heavy Duty, 120cm/4ft Long, Cut Proof 12mm Thick Square Chains with 4Keys 16mm U Lock Bike chain. I purchased the bike chain the same day that I ordered the alarms. I added the alarm to the chain because I knew as soon as the thief would move the chain the alarm would automatically go off and the other alarm would start going off as well. The alarm installation was simple. The alarms come with 3M stickers and zip ties. Once you chosen the location, all you have to do is use the 3M stickers and zip ties to secure it to the E-Bike. The 2nd alarm was also a simple process. To secure the alarm to the bike chain, all I had to do was cut some of the fabric off the bike chain and zip tie the alarm to the bike chain. The alarms come with remotes and to activate the alarm you only have to push the lock symbol once. I love the fact that I added alarms to my G50 because it gives me more confidence that my E-Bike will be safe.
DIY Locks with alarm function
Additional Customizations
Adding Style and Functionality with a Moped Style Trunk
Now that I am more confident with the security of my E-Bike. I wanted to add a lockable, moped style trunk to my rear rack. I wanted this because I knew it would add style, keep my belongings from getting damaged or wet. It also would bring extra security because whatever that I had stored inside would be locked in.
I looked online and they do have them on Amazon but I decided to go to my local bike shop to get one because I wanted to make sure that it would fit on the G50 rear rack. The fit was perfect. The only problem that I had was that the holes for the moped style trunk didn't line up with the G50 rear rack holes. Once I began installation for the moped style trunk. I took the brackets that were included with the moped style trunk and drilled holes to match the ones on the G50 rear rack. It worked and moped style trunk looks like it is part of the E-Bike. My G50 stands out. Most importantly I'm able to secure & not worry about the things I buy while I'm out on my G50 because I know that it is going to be safe and not be able to get wet or damage.
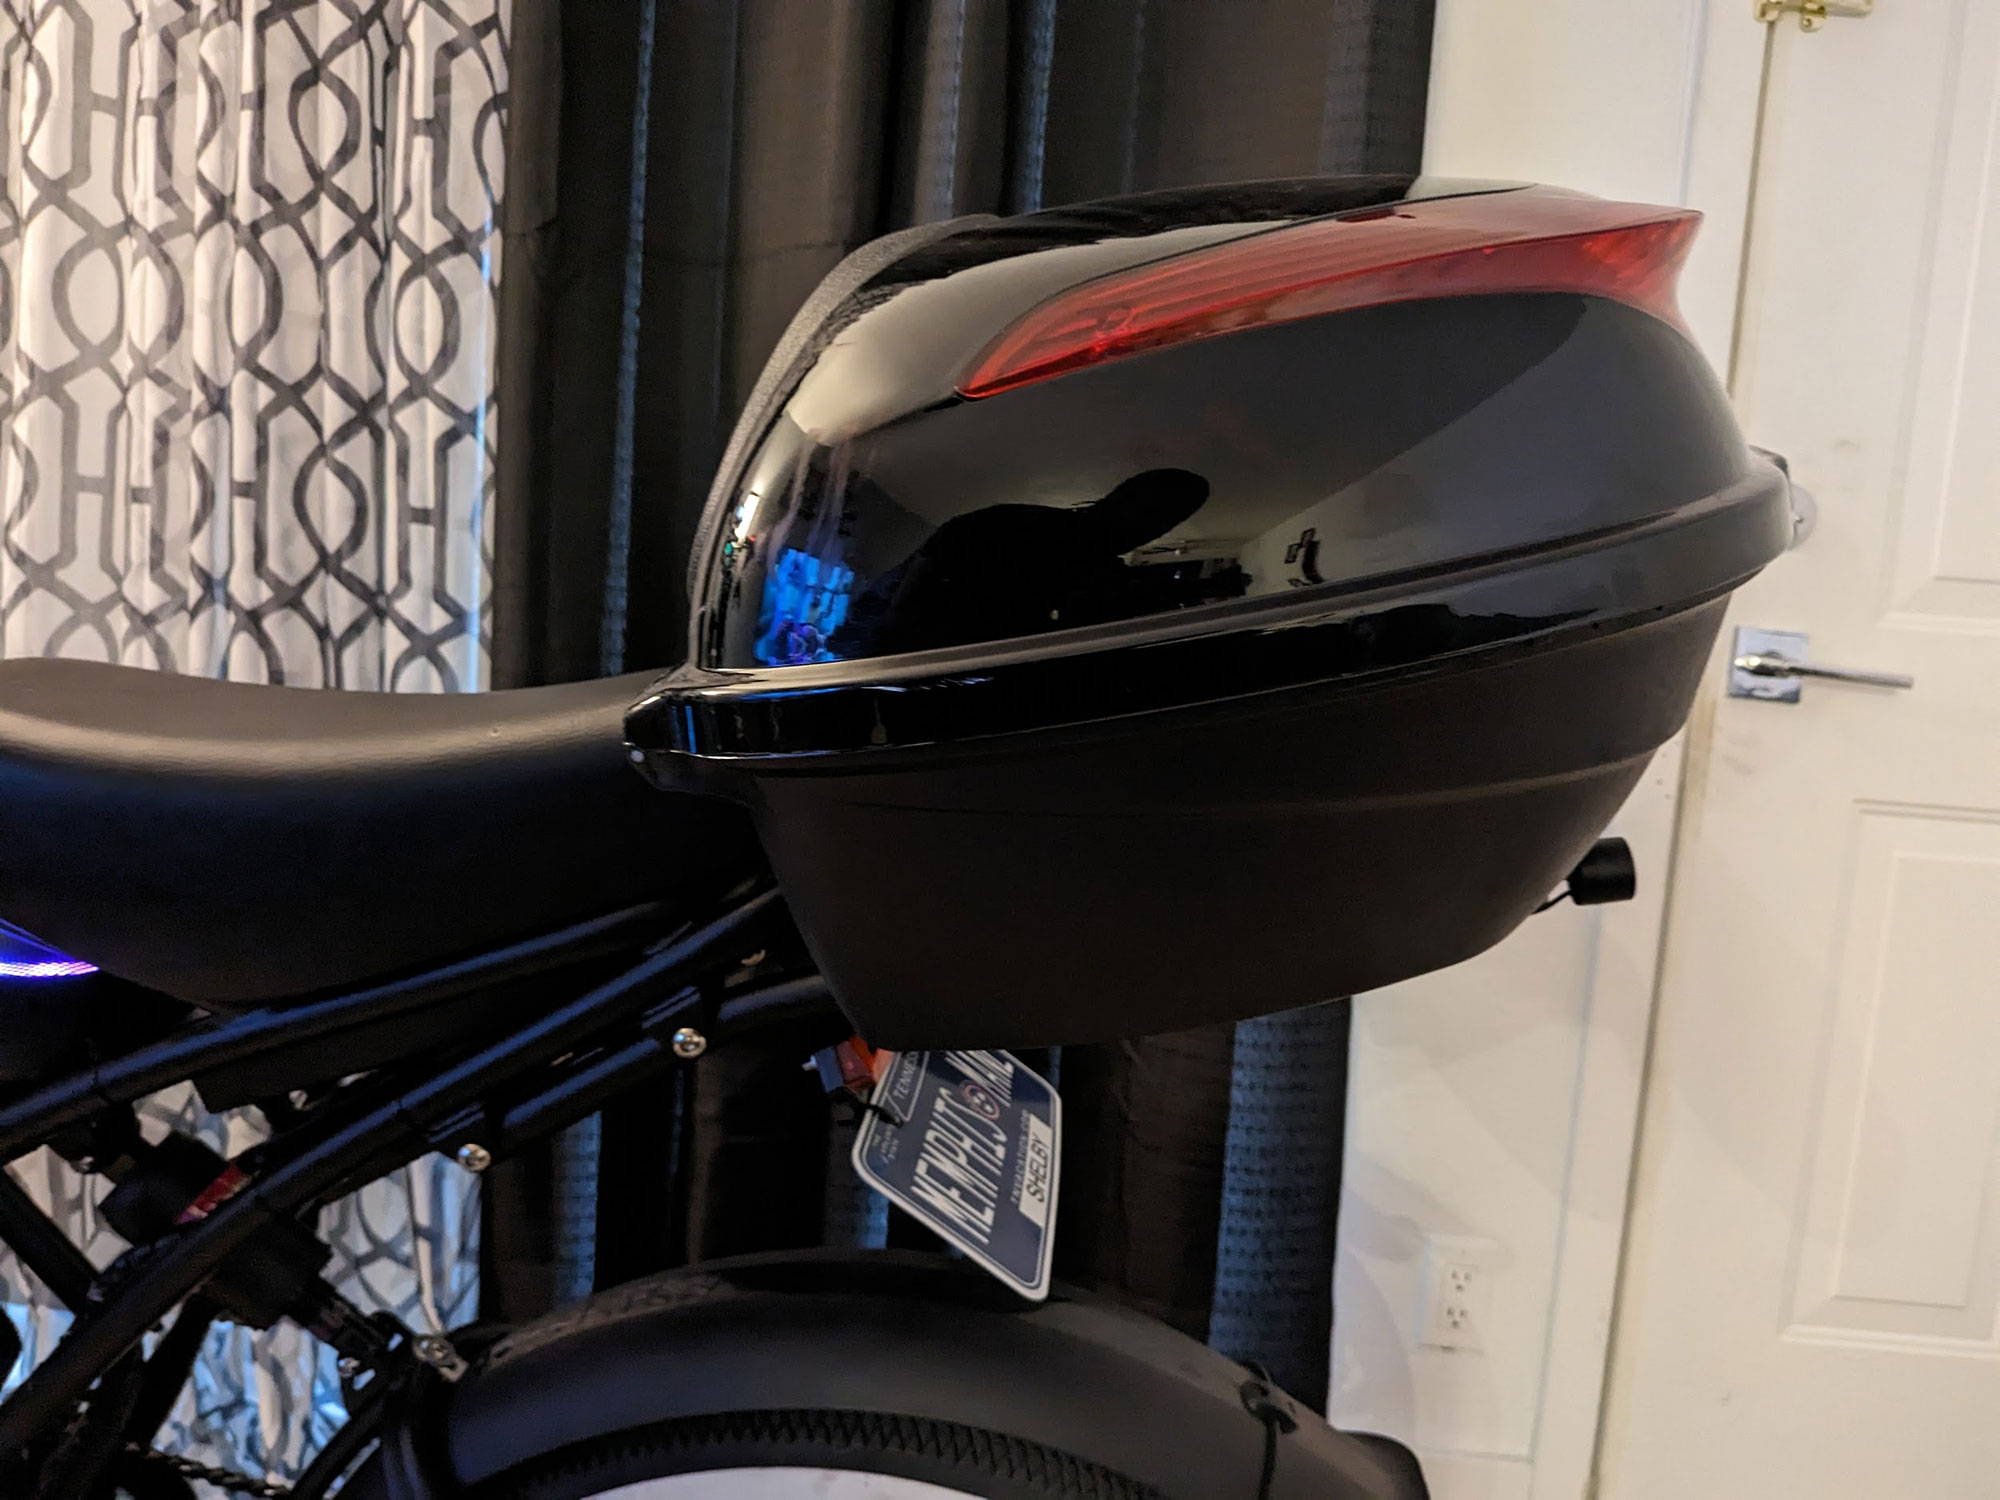

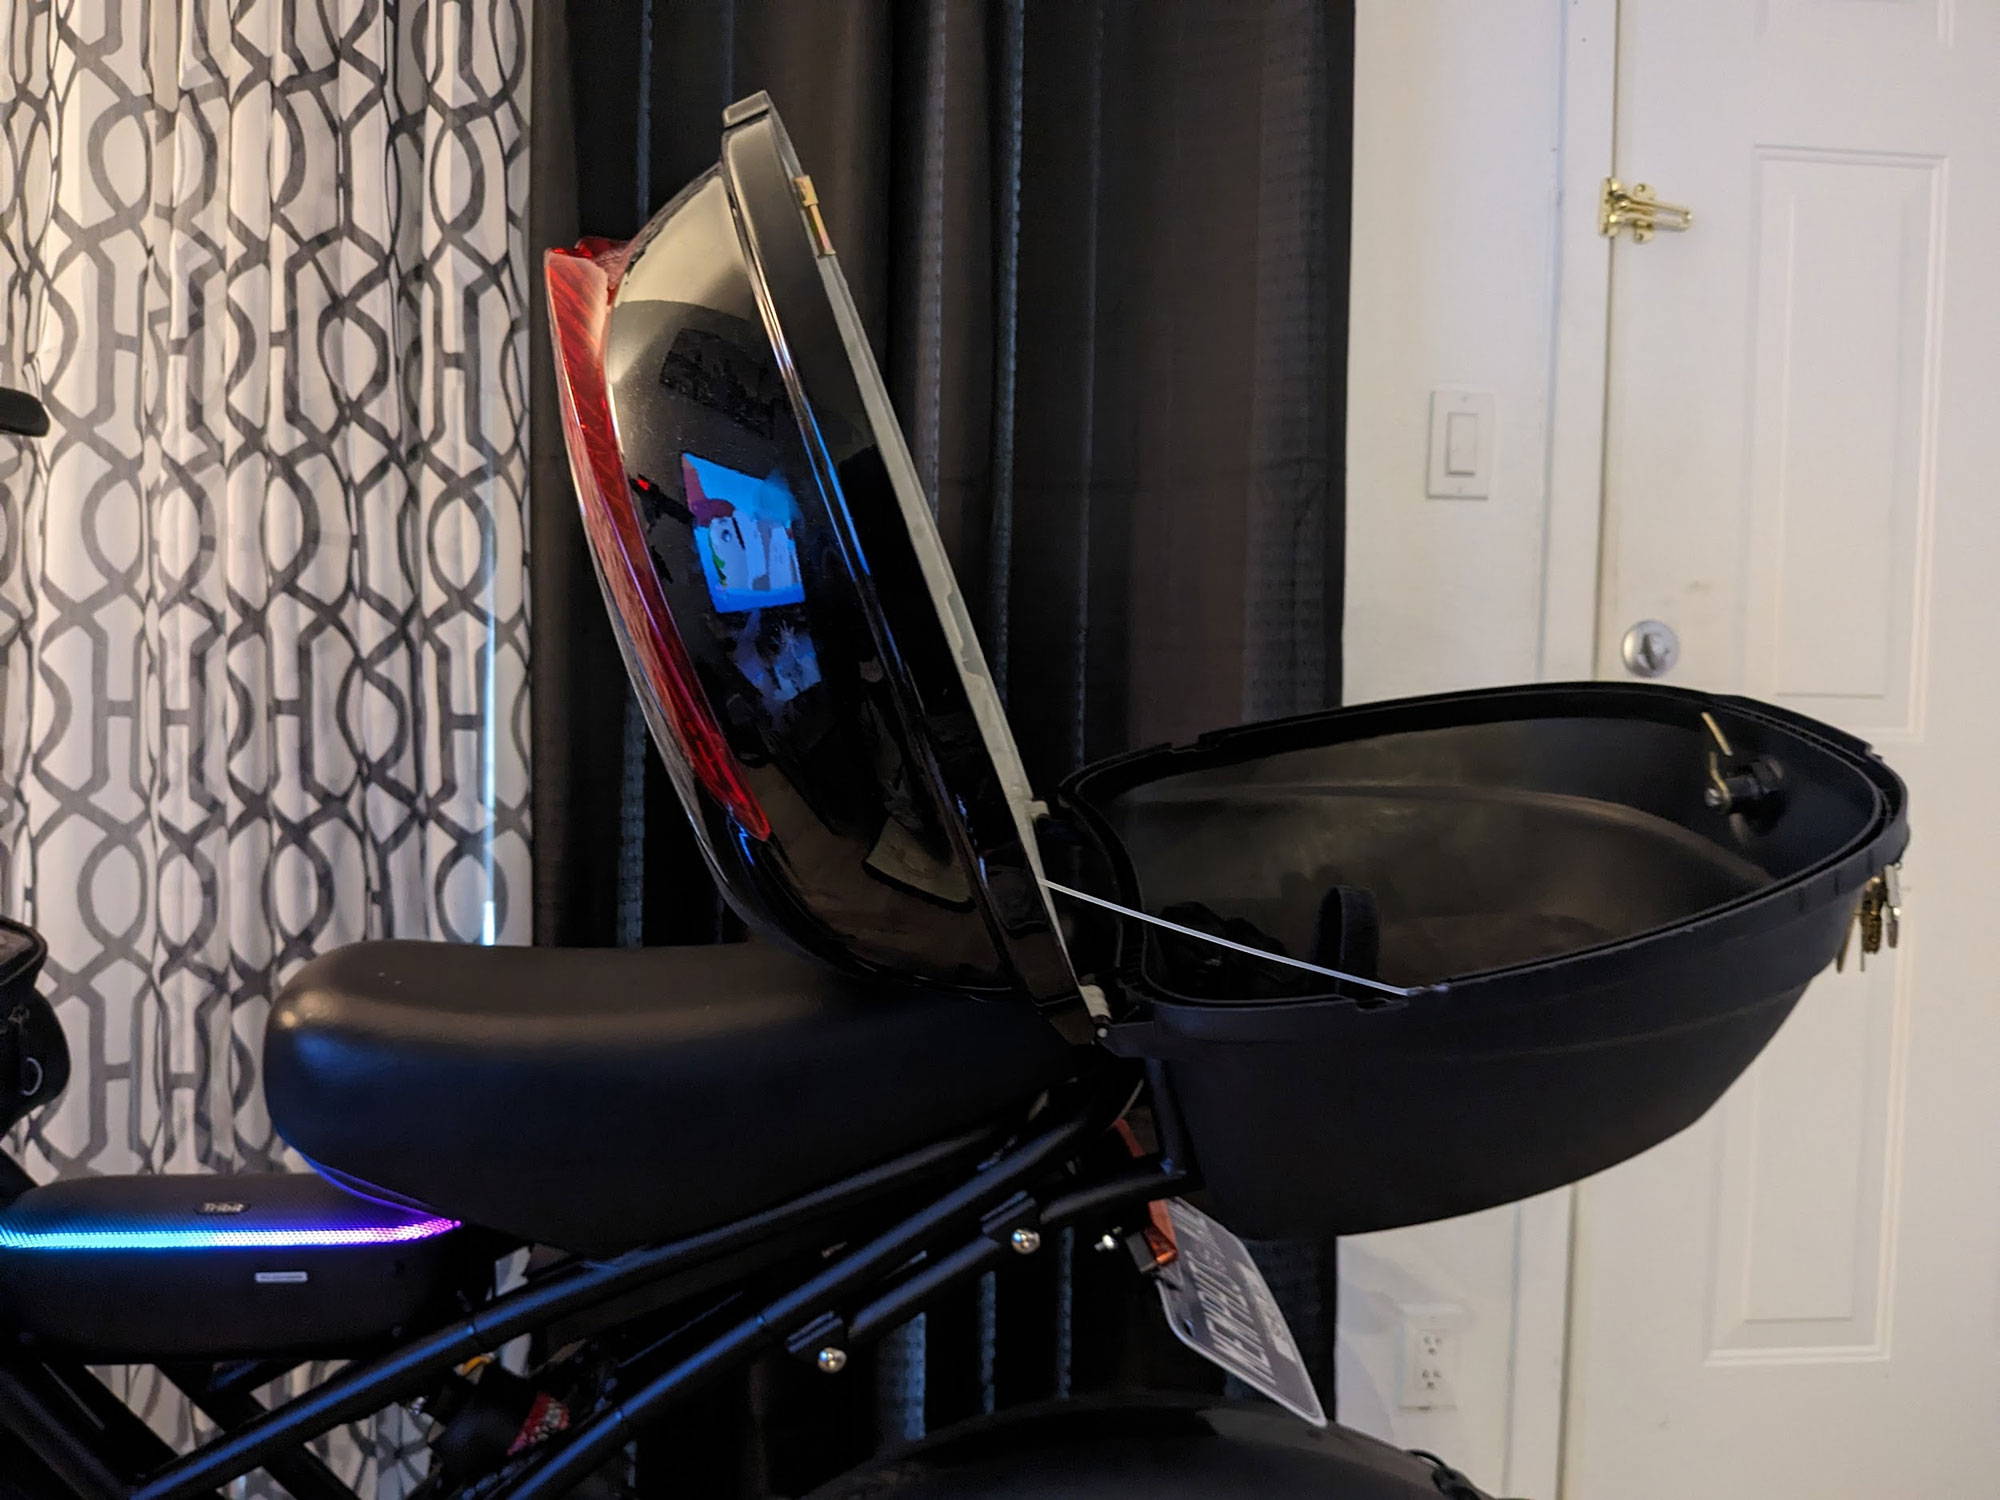
Electric Bike Moped Style Trunk
Upgrading to 20" White Wall Tires
My DIY Journey was getting close to the finish line but still I knew something wasn't right. The HappyRun Tank G50 is very comfortable to ride but the tires that came with the G50 is geared for off road. My commute is only done on street pavement roads. So I figured that I should switch the tires out to achieve the ultimate comfort that I wanted. I went online and found the YunSCM 20" E-Bike Fat Tires 20" x 4.0" Classic White Wall Tires and 20" Bike Tubes with 2 Nylon Rim Stips for 20x4.0 E-Bike Bicycle Tires and Tubes- 2 Pack. I didn't want regular black wall tires. I love white walls tires & with beautiful design of the HappyRun Tank G50. I knew that the white wall tires would complete my DIY Journey that I started not to long ago. I knew the tires would bring my customization out & bring them to life. My HappyRun Tank G50 now turn heads in the E-Bike community & has everyone asking questions about the HappyRun Tank G50. I simply give them their website and tell them check it out. I jokingly tell them that when it comes to eye catching designs. “HappyRun Sports is the Tesla of E-Bikes".
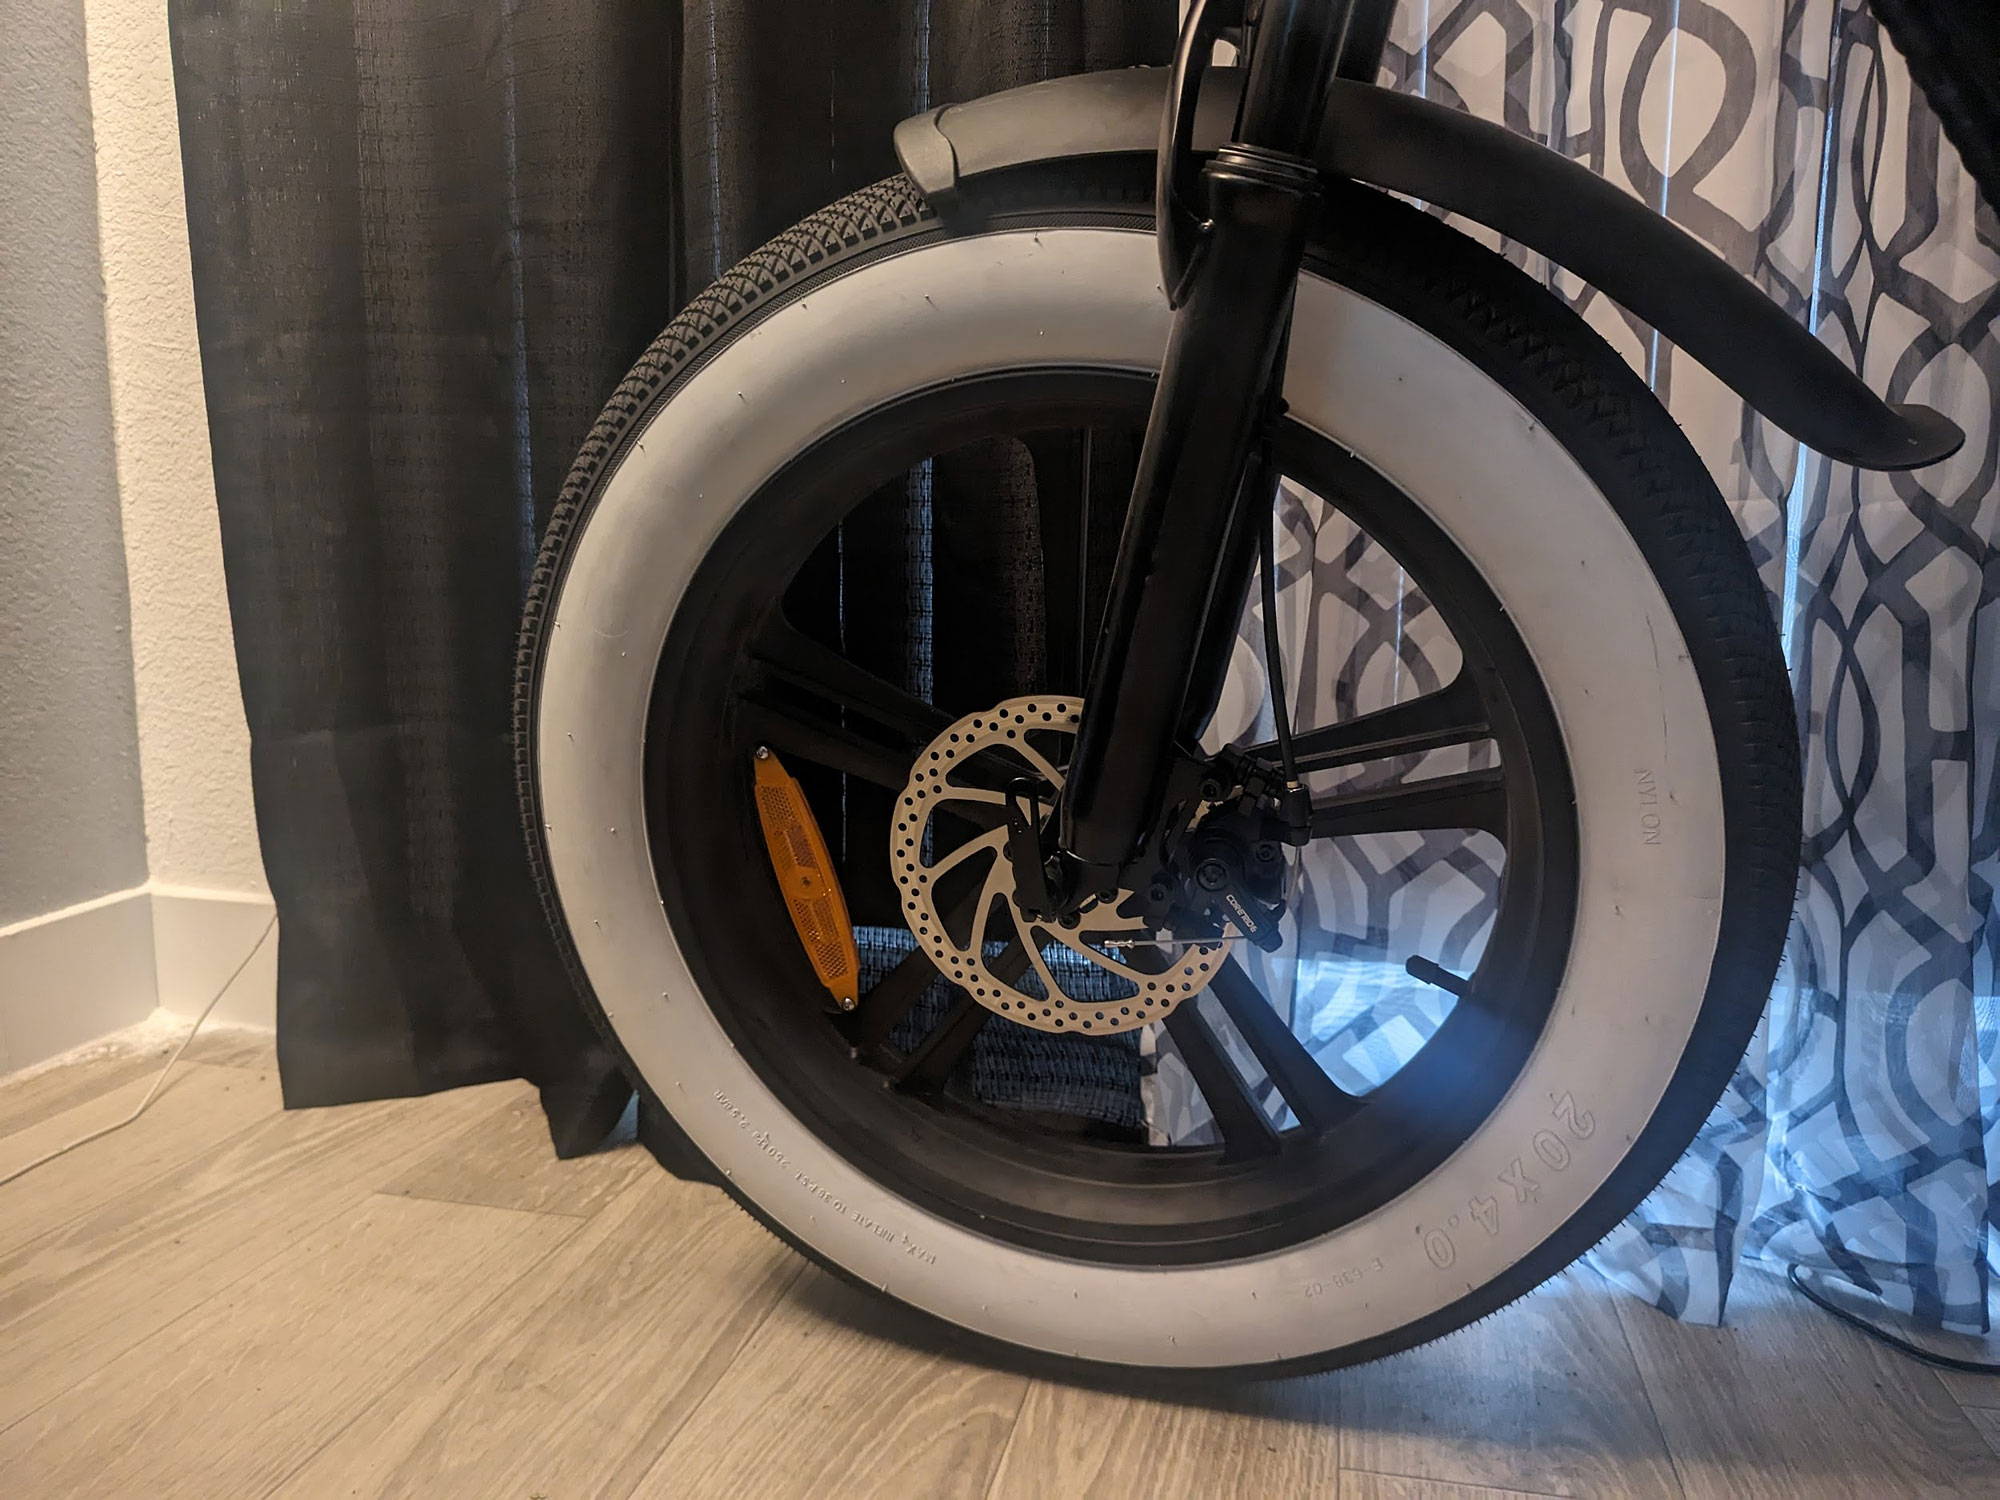


DIY White Fat Tire Electric Bike
How Do I Install Accessories on My E-Bike?
To install accessories on your e-bike, gather necessary tools like Allen keys and screwdrivers. Follow the specific installation instructions provided with each accessory. Generally, you’ll need to secure components like racks or lights using bolts or brackets. Ensure everything is tightened properly and test functionality before hitting the road.
Installing accessories on your e-bike can be straightforward if you follow these steps:
- Gather Tools: Ensure you have the necessary tools, such as screwdrivers, wrenches, and zip ties.
- Follow Instructions: Each accessory typically comes with installation instructions; following these closely will ensure proper setup.
- Secure Cables: Use zip ties or Velcro straps to secure any loose cables neatly along the frame.
Proper installation is crucial for both safety and functionality.
What Are the Benefits of Personalizing My E-Bike?
Personalizing your e-bike enhances comfort, performance, and style. Custom upgrades can improve ergonomics, making rides more enjoyable, while aesthetic modifications reflect your personality. Additionally, tailored components can increase safety and functionality, allowing you to optimize your bike for specific riding conditions or preferences.
Personalizing your e-bike offers several benefits:
- Enhanced Safety: Adding features like mirrors or lights improves visibility and safety while riding.
- Improved Comfort: Customized components, such as ergonomic grips or adjustable seats, can enhance comfort during long rides.
- Unique Style: A personalized e-bike reflects your personality, making your ride more enjoyable.
How Can Custom Paint Jobs Enhance Your E-Bike?
Custom paint jobs enhance your e-bike by allowing you to express your unique style and personality. A vibrant or personalized design can make your bike stand out while providing a sense of ownership. Additionally, a well-done paint job can protect the frame from scratches and corrosion, extending its lifespan.
- Visual Appeal: A unique color scheme or design can make your bike stand out in a crowd.
- Brand Identity: If you have a specific theme or brand in mind, custom paint can help convey that.
- Protection: Quality paint jobs often include protective coatings that guard against scratches and wear.
What Accessories Can Improve Safety and Functionality?
Accessories that improve safety and functionality include bright LED lights for visibility, reflective tape for added awareness, and a sturdy rear rack for carrying items. Fenders help keep you clean in wet conditions, while mirrors enhance visibility of surrounding traffic. Investing in quality locks also ensures security when parking your e-bike.
- Lights and Reflectors: Essential for nighttime visibility and safety.
- Mirrors: Help monitor traffic behind you without turning around.
- Fenders: Protect you from water and mud while riding in wet conditions.
How Do Customizations Affect E-Bike Performance?
Customizations can significantly affect e-bike performance by optimizing comfort and handling. Upgrading components like tires or suspension improves stability and traction, while ergonomic adjustments enhance rider efficiency. However, be mindful that some modifications may alter weight distribution or power requirements; always ensure compatibility with your e-bike’s specifications for optimal results.
- Weight Considerations: Adding heavier accessories may affect acceleration and handling.
- Aerodynamics: Certain modifications, like fairings or streamlined components, can improve aerodynamics, enhancing speed.
- Comfort Enhancements: Upgrades that improve comfort allow for longer rides without fatigue, indirectly affecting performance.
Understanding how each customization affects performance helps riders make informed decisions.
Protecting and Maintaining Your E-Bike
My story doesn't end here. Since all the customizations that was done. I needed to be able to protect my HappyRun Tank G50 from all seasons of weather. So I purchased the E-Bike Covers, Outdoor Waterproof Bicycle Covers with Lock Hole for Mountain Road Electric Bikes from Amazon. I loved the fact that it is waterproof and it keeps my G50 dry from the rain. The best part about bike cover is that it serves as extra protection from thieves. The bike cover includes a lock hole to lock the bike cover down and keeps it from moving with my U lock or bike chain. I love that I can put on my U-locks and bike chains and turn on my alarms. Once I put on the bike cover and put a lock on it. A thief can't tell what type of security that I put on my G50. They will only see the lock that's on the loophole from the bike cover. If a thief attempts to steal my G50. My alarms will start going off while they are taking off the bike cover. It is just added security protection to give me a piece of mind.
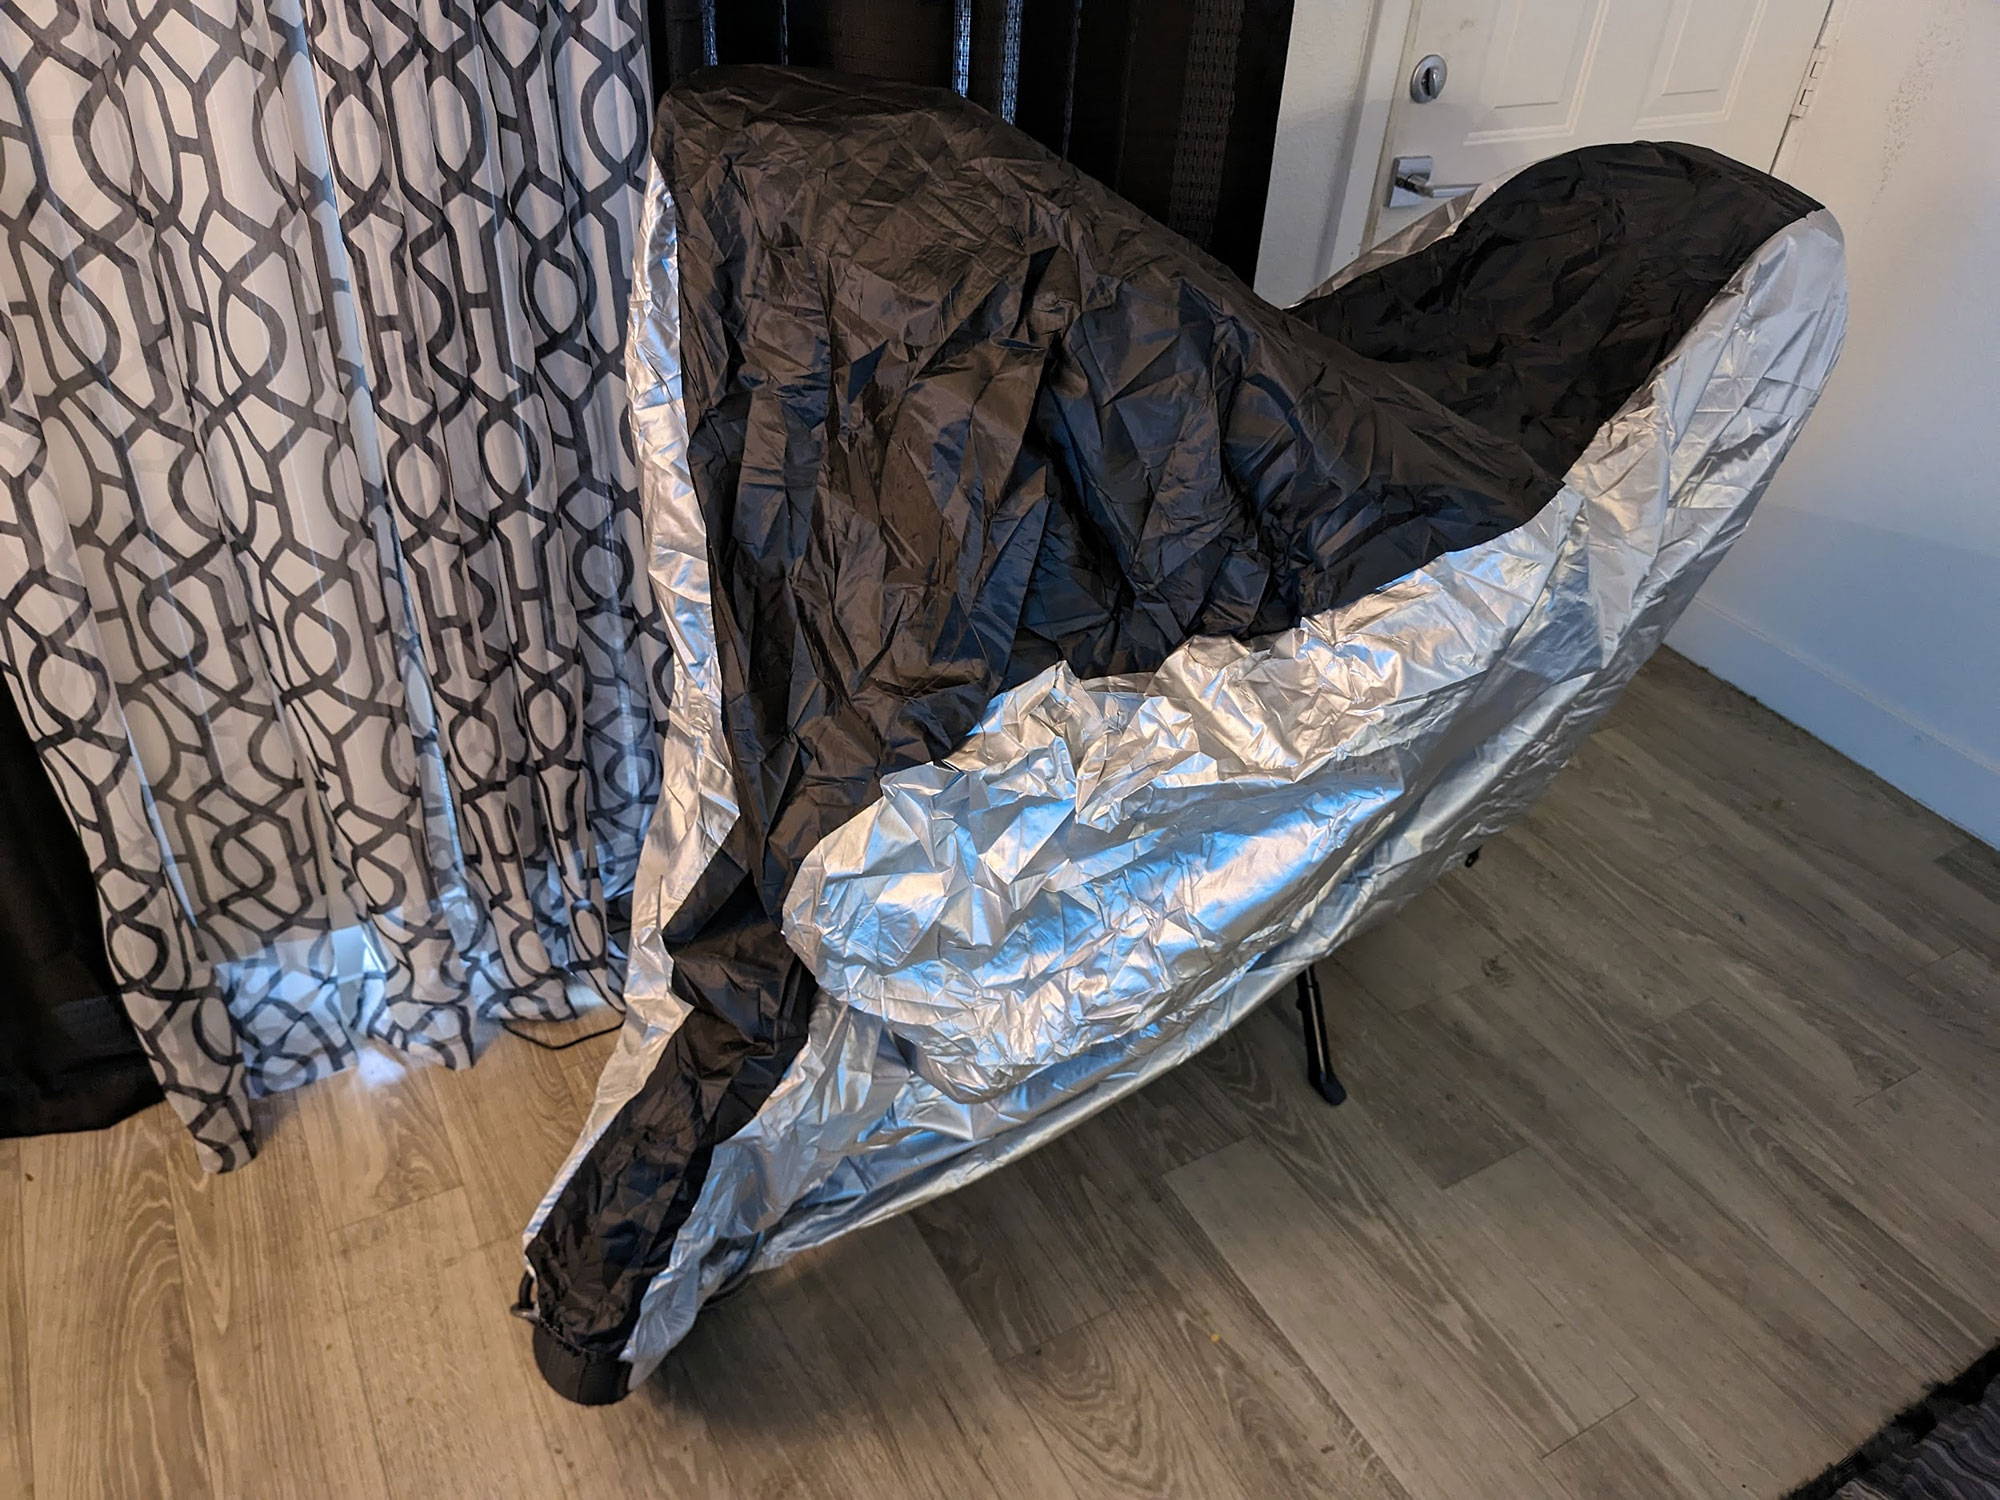
E-bike Cover
Buying Tips
When personalizing an electric bike like the HappyRun G50, consider your riding style and needs before making upgrades. Focus on practical enhancements that improve safety and comfort, such as lights, mirrors, and ergonomic grips. Brands like HappyRun, known for their commitment to quality since 2014, provide reliable options for accessories that can elevate your riding experience.
E-Bike Expert Views
“Customizing your e-bike is a fantastic way to enhance both its functionality and style,” says biking expert John Doe. “Always consider how each modification will impact your ride quality and safety.”
Conclusion: Personalizing Your E-Bike Journey
Well, that's it for my DIY...I hope you enjoy it or at least encouraged to do DIY of your own. My YouTube channel is listed below. You can watch the video and the links for everything I purchased are in the description of the video as well.
DIY E-Bike Journey on YouTube Chanel by MemphisDarrylB


Hi, Ineed a rear rack for G60 pro urgently. So, can anyone help me?
Leave a comment